Articles in this section
4. Plugin – Merchant Configuration
When installing the plugin for the first time, the merchant needs to go through the Configuration section of the plugin. This section instructs the merchant how to configure the plugin before putting it into use in the e-commerce site.
1. Select country
- Select the country from which your packages are shipped.
- Click ‘Continue’ to go to next screen.
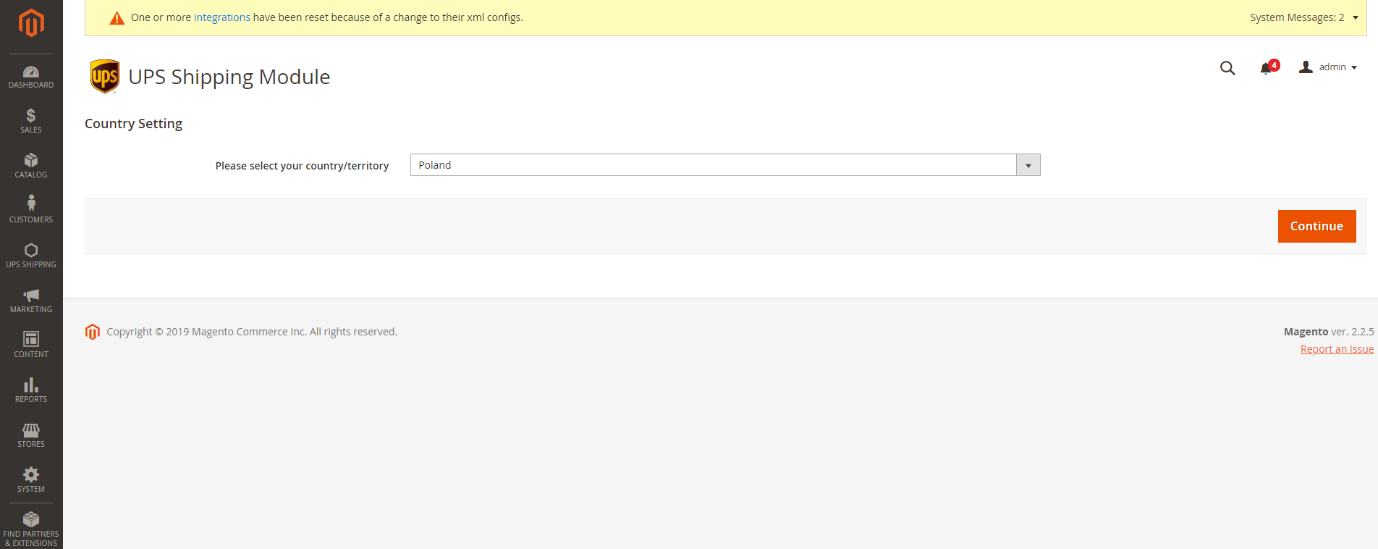
Figure 27 – Country setting
2. Accepting Terms & Conditions
- User needs to read through the UPS terms and conditions as well as the plugin usage agreement, then confirm that the user agreed to them. The user cannot proceed to the next steps if these terms and conditions are not agreed to.
- Click ‘Continue’ to go to next screen.
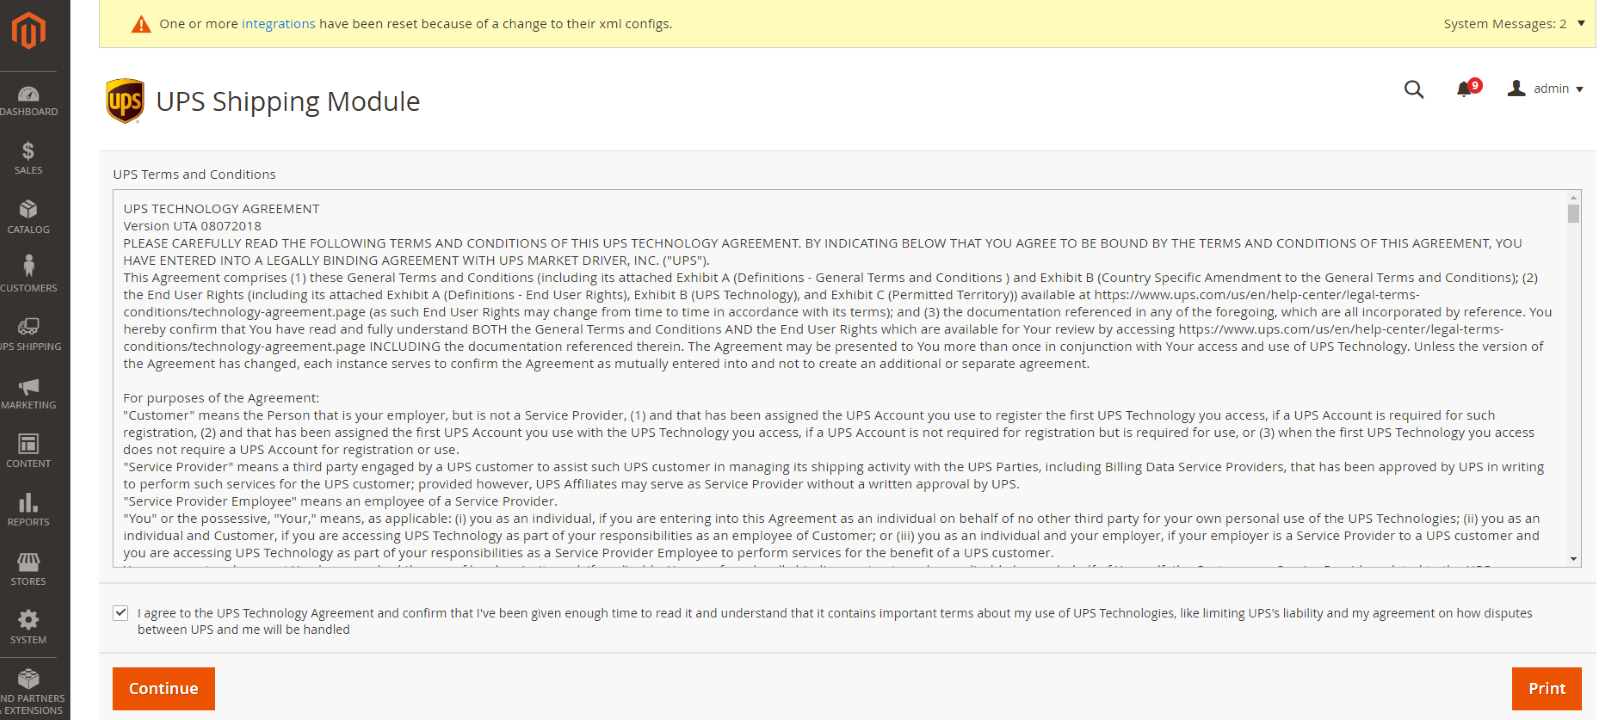
Figure 28 – UPS Terms and Conditions
3. Account
- NOTE: If you have an existing UPS account number, while registering yourself on the Account page, please use the exact registered pickup address (which might be different from your invoice billing address) associated with this account number. Please note that the format of the postal code or zip code should exactly match the one provided in the registered pickup address. If you have any difficulties understanding which address to use, please contact your local UPS sales representative or open a support ticket.
- This screen allows merchants to configure their account to use UPS Shipping service. The merchant needs to fill out the required personal information to start using the plugin as instructed in the screen.
- After filling the personal information, user selects one of the three options that is best applicable to them and fills in the required information:
i User has a UPS account with an invoice occurred in the last 90 days.
ii User has a UPS account without an invoice occurred in the last 90 days.
iii User does not have a UPS account.
i. Merchants who have a UPS Account and have invoices with UPS occurred in the last 90 days
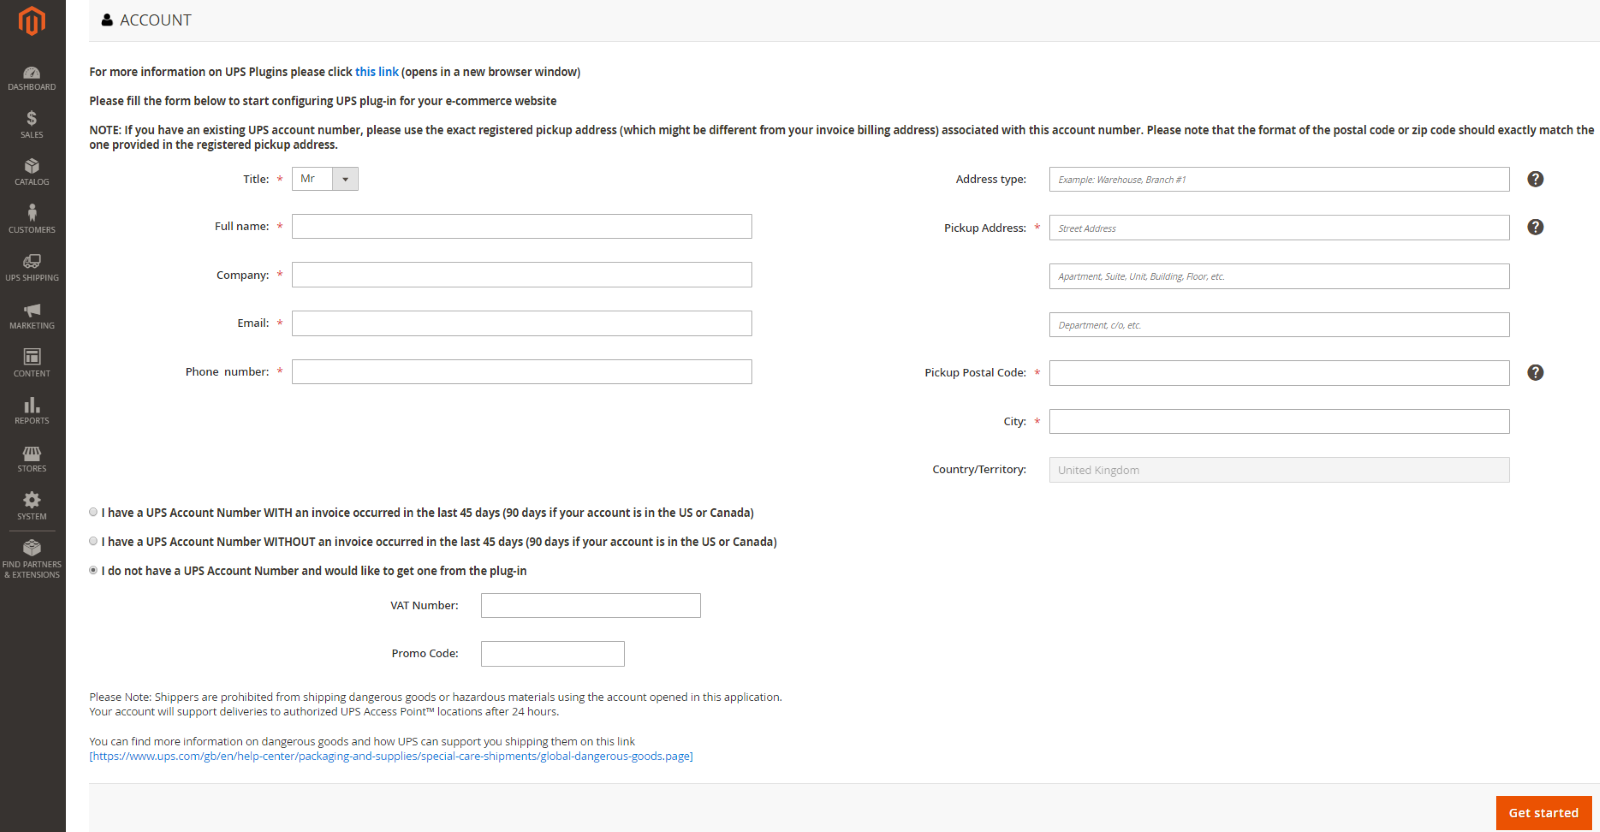
Figure 29 – User’s Account information
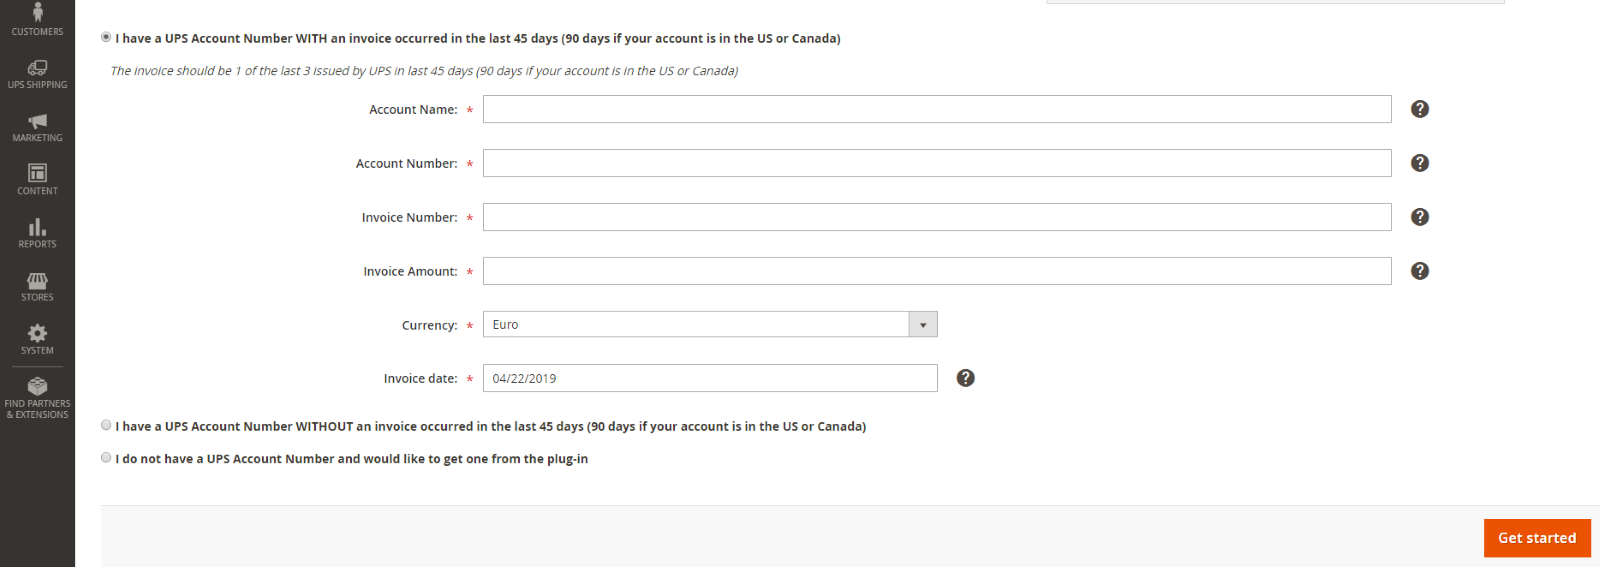
Figure 30 – User has UPS Account with invoice in the last 90 days
ii. Merchant who has UPS account number but does not have invoices in the last 90 days

Figure 31 – User has Account number without invoice in the last 90 days
iii. Merchant who doesn’t have a UPS Account Number and would like to get one from the plug-in
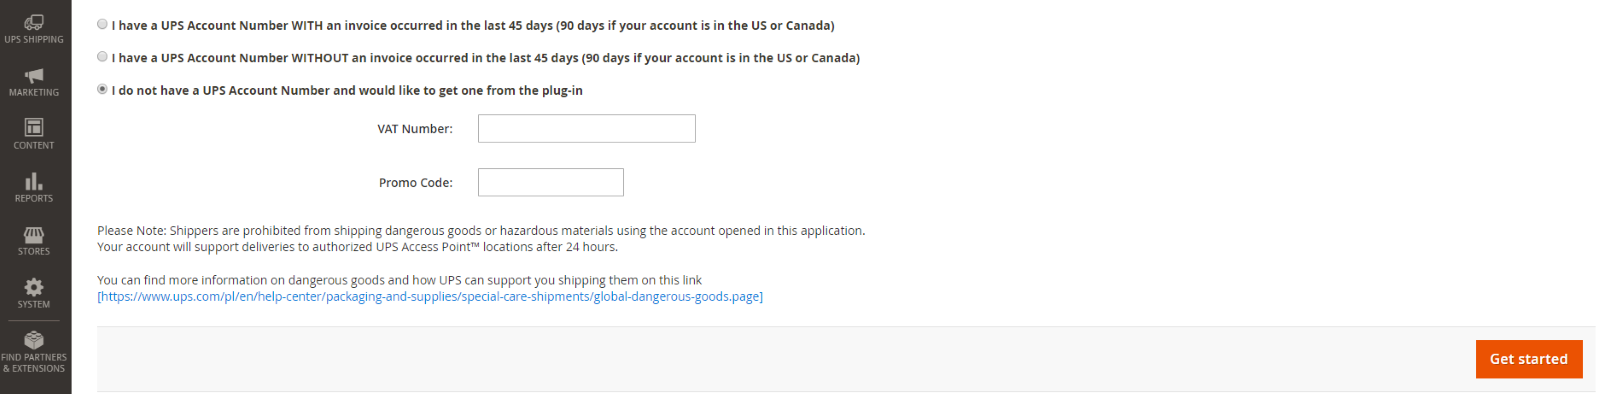 Figure 32 – User don’t had UPS Account Number
- Any incorrect information will result in incorrect configuration. All information has to be entered correctly by the merchant to activate the plugin. If merchant is unsure, they can open a support ticket for information prior to activation.
4. Shipping Services
- Various shipping services information, which are available for the particular area would be displayed here. Merchant can select which one is suitable for his/her e-shoppers.
- This shipping service list is automatically loaded from UPS database, depending on the country chosen in the first screen.
- The user being able to select an account from the drop down list on the Shipping Services page
- Saturday Delivery (as a selectable option) is only available for users in Europe. If selected, the service is shown in the checkout screen when the delivery address, pick up address and pick up date/time combination is eligible for a delivery on Saturday.
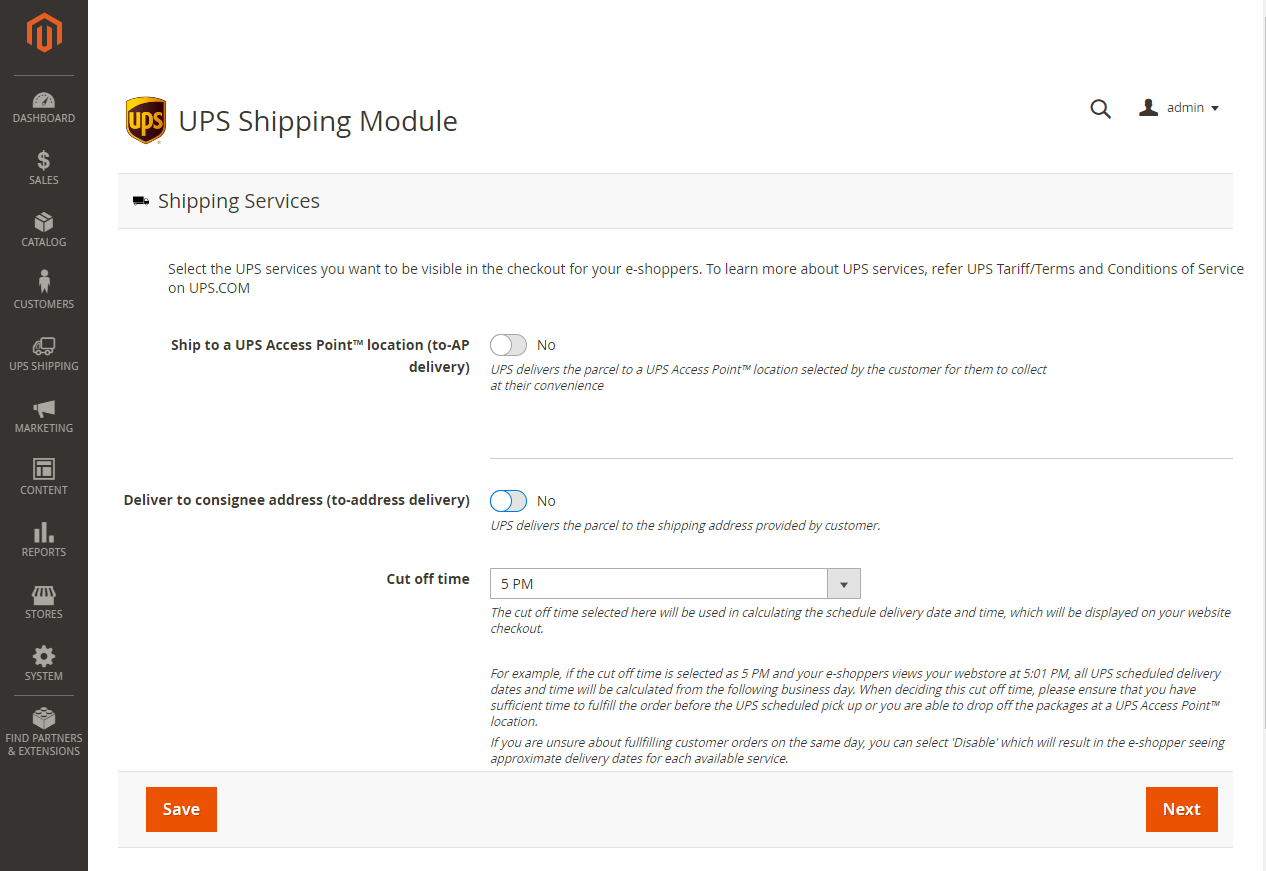
Figure 33 – Shipping Services Configuration
i. Deliver to UPS Access Point™ (to-AP delivery)
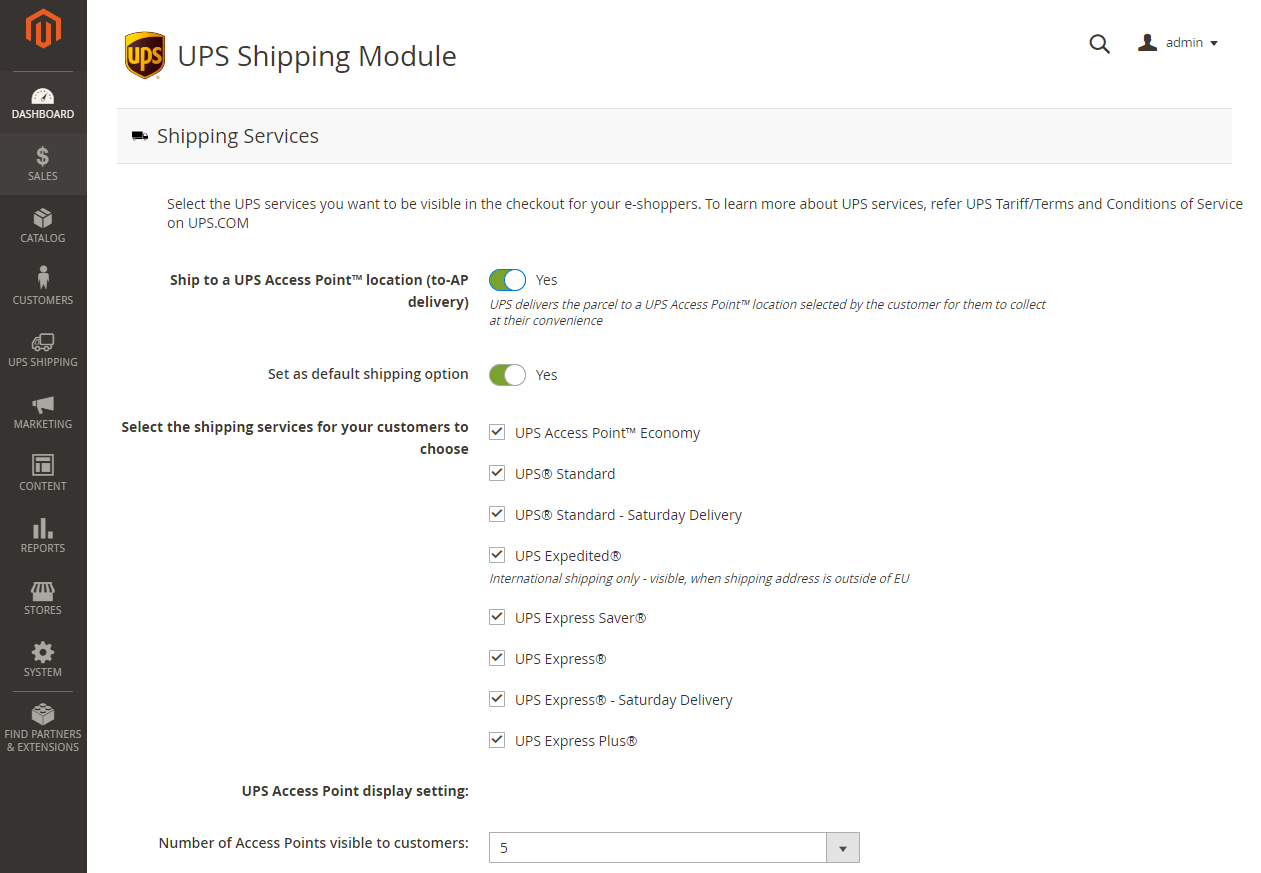
Figure 34 – Deliver to UPS Access Point™ (to-AP delivery)
ii. Deliver to consignee address (to-address delivery)
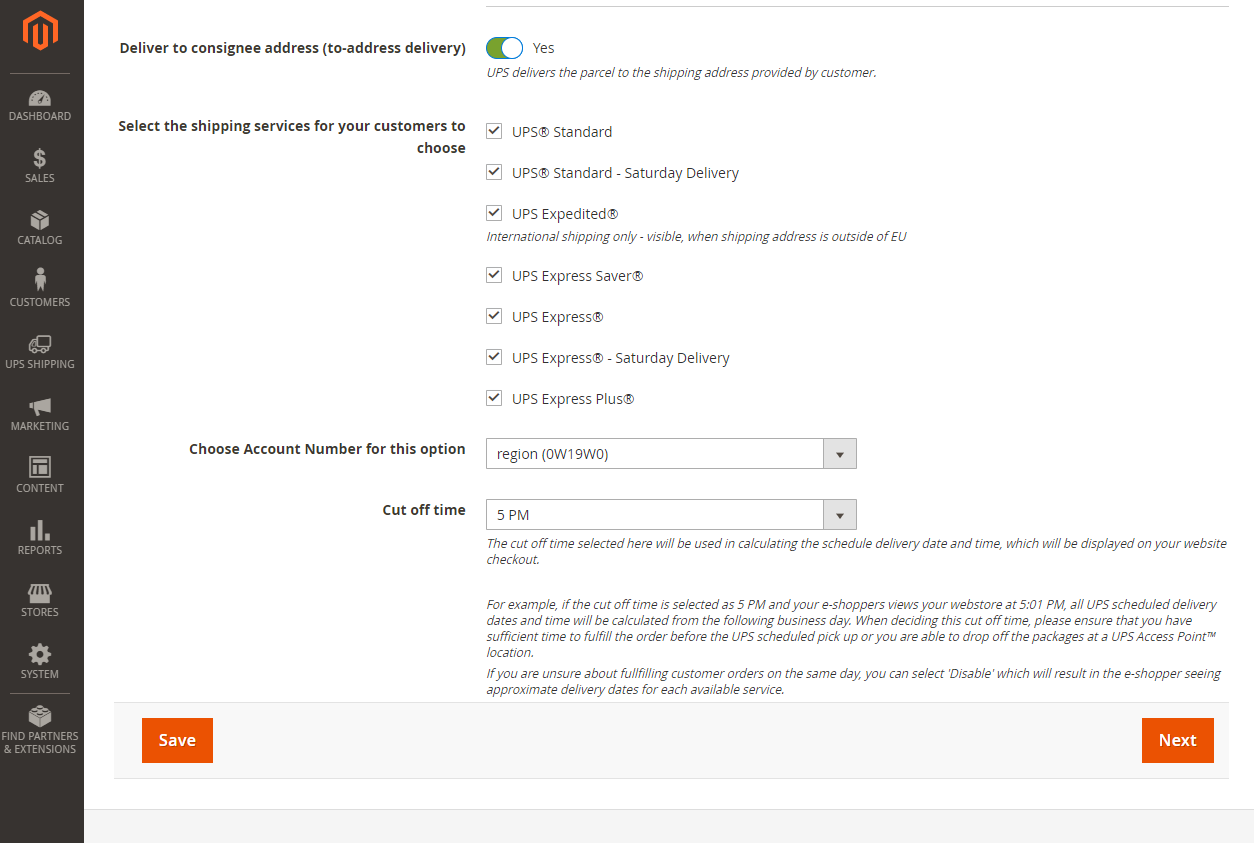
Figure 35 – Deliver to consignee address (to-address delivery)
5. Collect on Delivery (COD)
- UPS Shipping Plugin automatically detects whether user’s Magento website has installed the COD module, and displays that status in the ‘COD Option’ Section.
- If user wishes to use COD service, he/she could go to Magento’s market place to install the COD module by Magento and activate that module.
- If user wishes to disable COD service in UPS Shipping Plugin, he could deactivate the COD module of Magento. UPS Shipping Plugin will automatically update accordingly.
- Click ‘Next’ to go to the next screen.
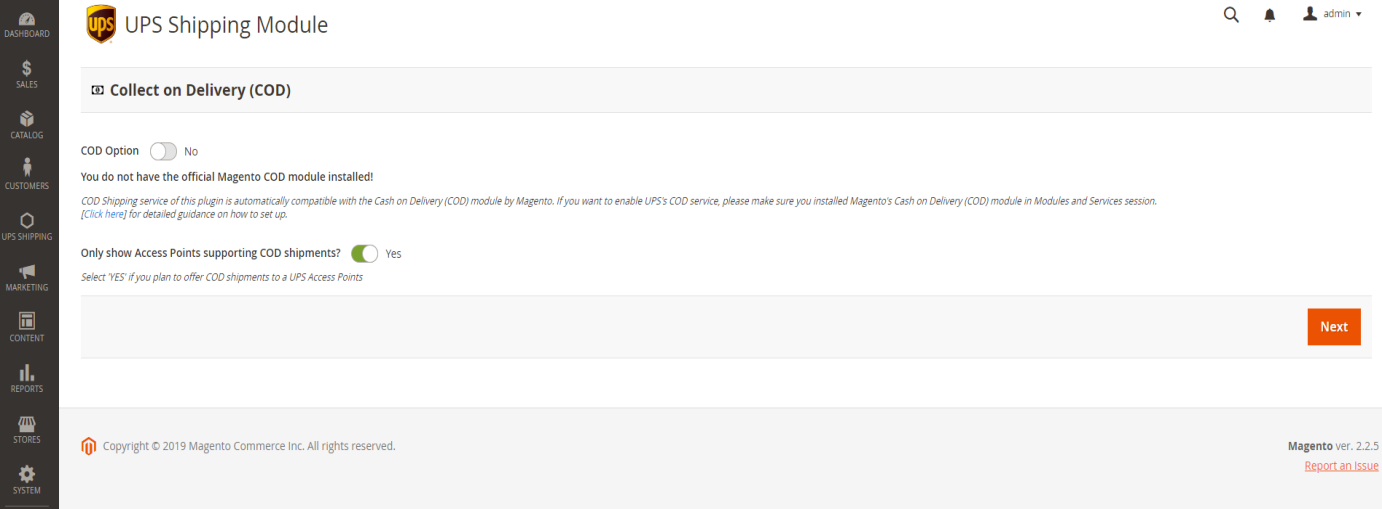
Figure 36 – Collect on Delivery Configuration
6. Package Dimension
- The user can decide if they want rates calculated and displayed based on:
- Basic – (The number of items in the order determines package size) – This option is best when you sell a single product type and the size of the package for shipping only changes based on the number of products in the customer’s order
- Enter at least one default package size for 1 item in the order
- Enter additional default package sizes based on the number of the items in the order that force a larger average package size
- The package size entered for the highest number of items in the order will apply for all orders equal to or greater than that number of items
- In the example below, an order of 1-2 items will rate based on a 12 x 12 x 12 package at 3 lbs, an order of 3-4 items will rate based on a 20 x 20 x 12 package at 6 lbs and every order with 5 or more items will rate based on a 24 x 24 x 24 package at 10 lbs
- Basic – (The number of items in the order determines package size) – This option is best when you sell a single product type and the size of the package for shipping only changes based on the number of products in the customer’s order
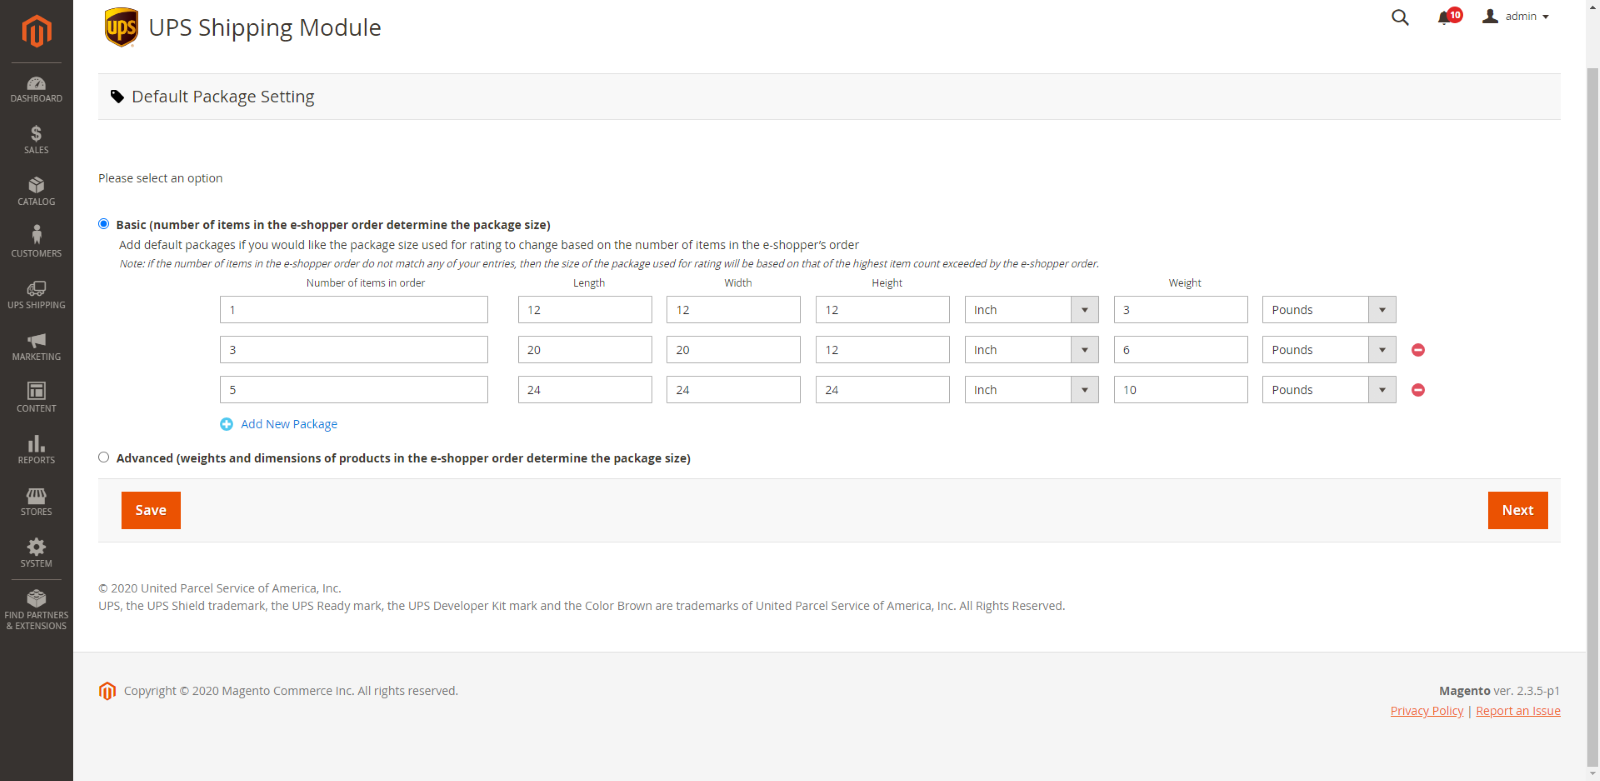
Figure 37 – Package Dimensions Configuration – Default package weight and dimension
- Advanced – (Weights and dimensions of products in your customers order, determine the package size) – This option is best when you sell different products ranging in size and weights and the size of package changes based on which and how many products are in the customer’s order
- To use this option, you must enter product weights in the product settings of your shop.
- If you DO NOT enter product dimensions for each product in your product settings and wish to show rates based on order weight only, the select “No” for “Include product dimensions in rating”
- If you DO enter product dimensions for each product in your product settings and want more accurate rates with dimensions considered, the select “Yes” for “Include product dimensions in rating”
- Enter the sizes of the packages you use to fulfill orders. Note, the plugin will create a custom package size if your customer order is larger than the packages you enter
- Enter at least 1 “Back up” rate and service. This will ensure the consumer receives a rate if there’s a rating error cause by products missing weights, weights being greater than UPS limits, incorrect units of measure, etc.
- Note, units of weight must be entered kilograms and centimeters. Entering ounces or grams will result in an error and the “Back up” rate showing
- In the example below, the user has entered 3 package sizes for their orders, elected to include product dimensions in rating and will show “Back up” rate of $15.55 for UPS Ground to the consumer if there is a rating error

Figure 38 – Package Dimensions Configuration – Product dimension for rating
- Click ‘Next’ to go to the next screen.
7. Checkout Shipping Rate
- User can define the delivery rates offered for the e-shoppers here.
- The shipping services that user selected in the Shipping Service screen will be automatically loaded to this screen.
- User can configure the rates for each shipping service separately. Each shipping service can be configured with two rating options:
- Flat rates: all the orders will be categorized based on order value. If that value is smaller than a defined Order Value Threshold, the corresponding Delivery Rates will be applied. The order with the value higher than the highest Order Value Threshold will enjoy free shipping (Delivery Rate = 0).
- Example: a user configures the delivery rates for UPS Standard with following rules:
- Order Value Threshold: $50 | Delivery rate: $5: all the order with value under $50 will be charged $5 for delivery.
- Order Value Threshold: $100 | Delivery rate: $3: all the order with value higher than $50 but under $100 will be charged $3 for delivery.
- Example: a user configures the delivery rates for UPS Standard with following rules:
- Flat rates: all the orders will be categorized based on order value. If that value is smaller than a defined Order Value Threshold, the corresponding Delivery Rates will be applied. The order with the value higher than the highest Order Value Threshold will enjoy free shipping (Delivery Rate = 0).
- The applied delivery rates are illustrated in the chart below:

- Real time shipping rates: the delivery rates are calculated based on shipping rates quoted by UPS. User can configure to charge e-shoppers any percentage of that quotation.
- Click ‘Save’ to save the delivery rates configuration.
- Click ‘Next’ to go to the next screen.
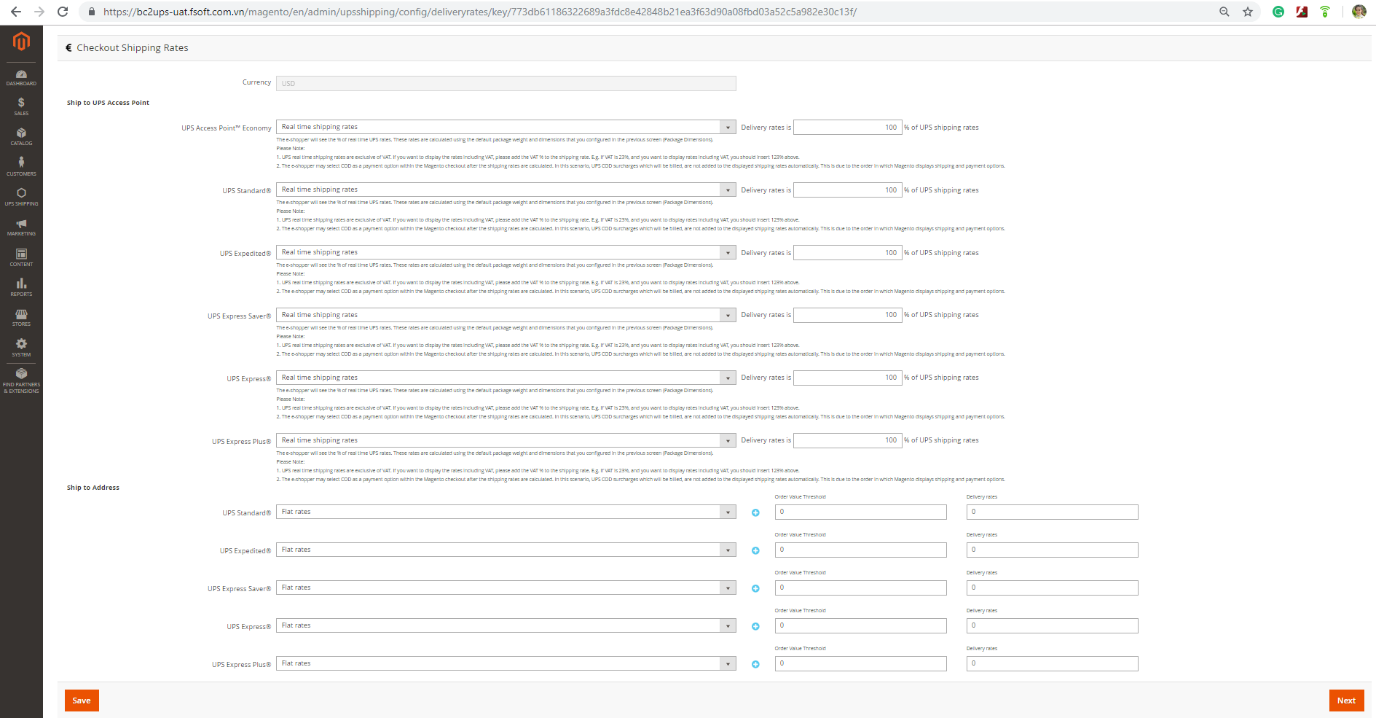
Figure 40 – Checkout Shipping rates Configuration
8. Complete Configuration
- This screen shows additional guidance for user to experience UPS’s services.
- User can also search for UPS Access Point and print COD and Pickup Registration form.
- Click ‘Complete Configuration’ to complete the configuration step.
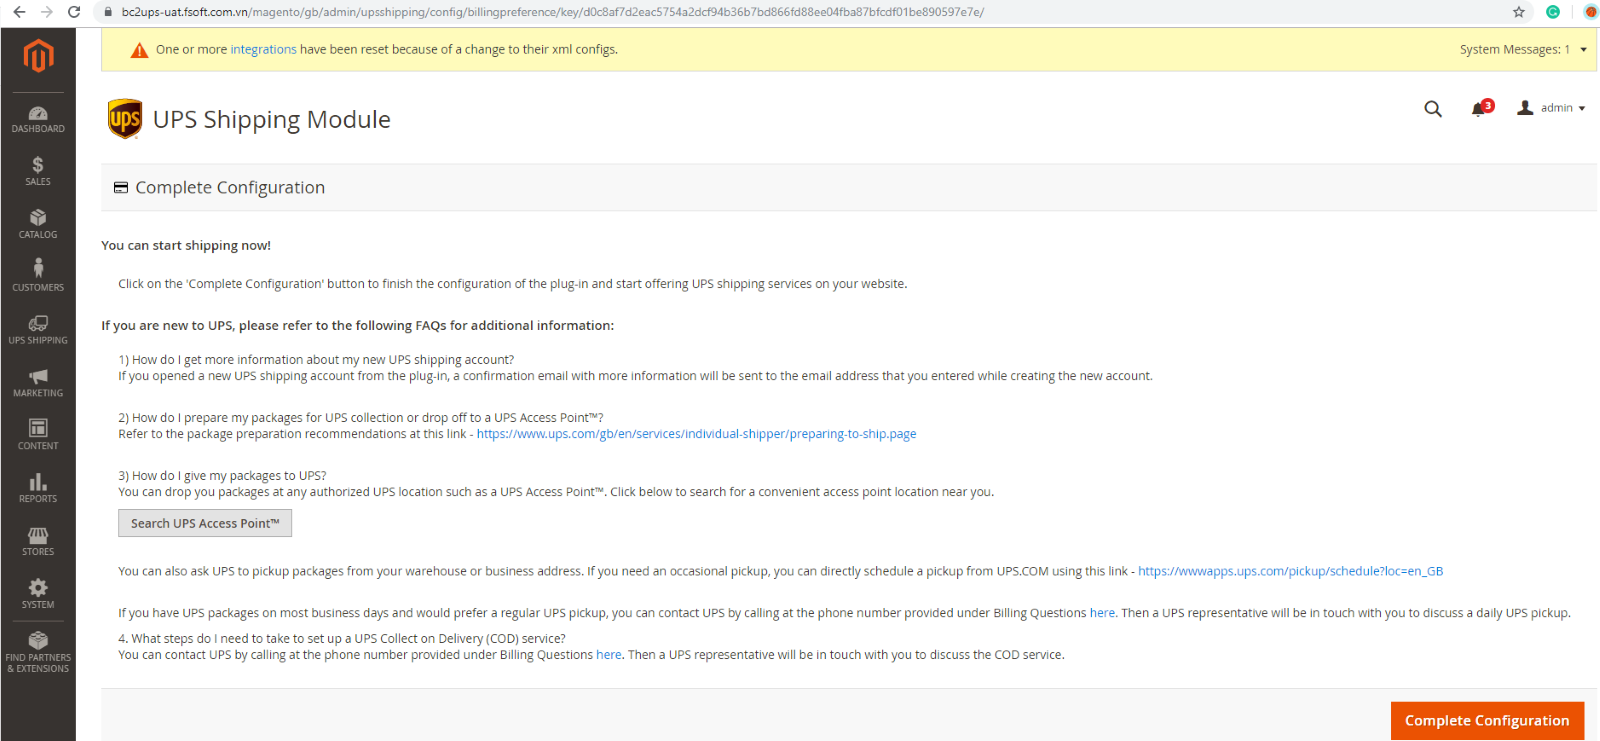
Figure 41 – Complete Configuration Preference
Was this article helpful?
Have more questions? Submit a request