


4. Plugin – Zending Beheer
Plugin – Zending Beheer Maak zendingen, print labels, volg pakketten en beheer retouren.
Stapsgewijze handleiding
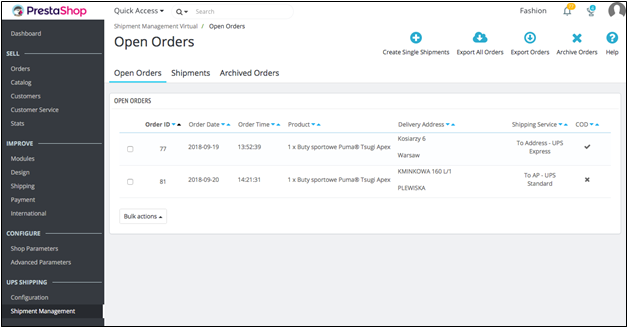
1. Open Bestellingen
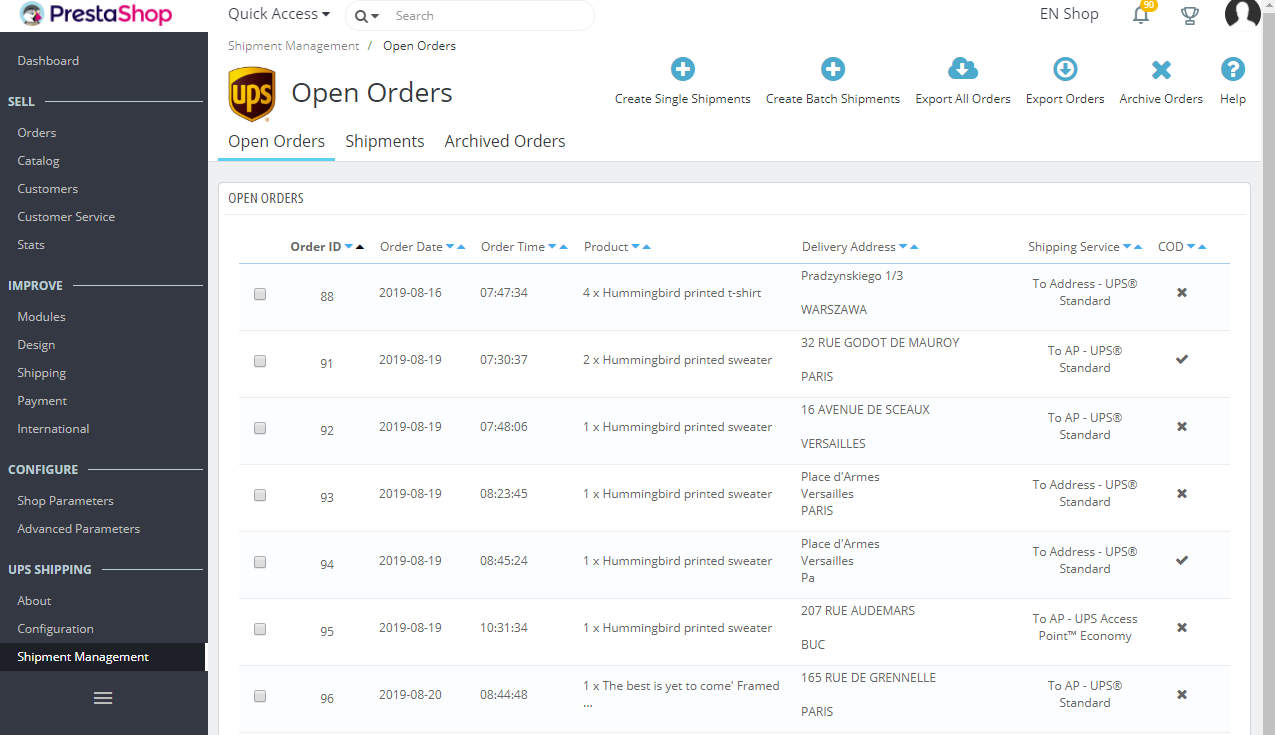
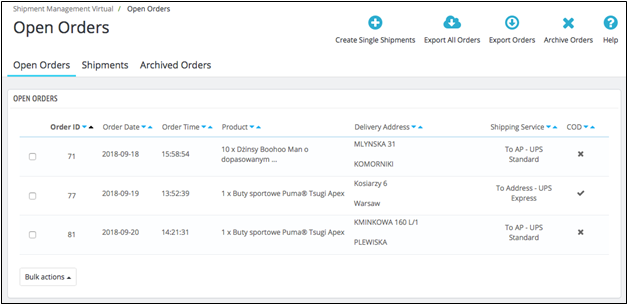
In the Open Orders tab, user can view all the orders which e-shoppers placed using UPS Shipping service.
In the Open Orders tab, user can view all the orders which e-shoppers placed using UPS Shipping serv
In the Open Orders tab, user can view all the orders which e-shoppers placed using UPS Shipping service.

User can select one or multiple orders to perform one of the following actions: Create shipments: co
User can select one or multiple orders to perform one of the following actions: Create shipments: confirm the shipment with UPS. Please see in section 2.Creating Shipment for details of creating shipment function.

Export Orders: export your selected orders to an excel file so that you can import to other systems
Export Orders: export your selected orders to an excel file so that you can import to other systems to process shipment.

Export All Orders: export all the historical orders to excel file.
Export All Orders: export all the historical orders to excel file.

Archive Orders: put the orders to Archived Orders tab.
Archive Orders: put the orders to Archived Orders tab.

2. Zending Maken
User can create shipment from one or multiple orders.

User can create shipment from one or multiple orders.
User can create shipment from one or multiple orders.

Multiple-order Shipment: To create multiple-order shipment, select the orders by the checkboxes besi
Multiple-order Shipment: To create multiple-order shipment, select the orders by the checkboxes beside each order, then click Create Shipments.
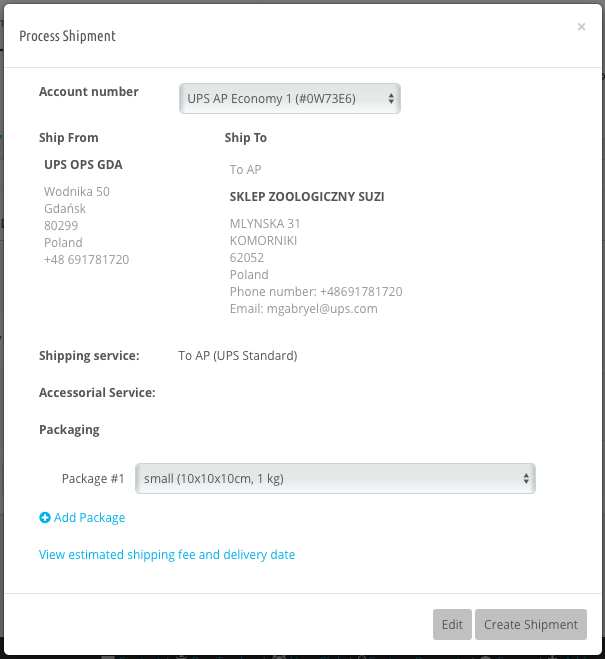
Edit shipment: User can edit the shipment before creating shipment by clicking to ‘Edit’ button.
Edit shipment: User can edit the shipment before creating shipment by clicking to ‘Edit’ button.
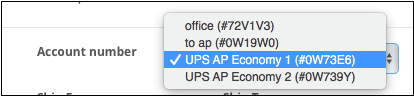
Account number selection: Select the Account number to associate with the shipment by the dropdown ‘
Account number selection: Select the Account number to associate with the shipment by the dropdown ‘Account Number’.

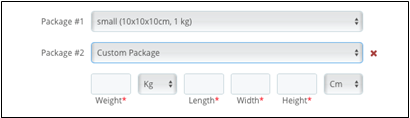
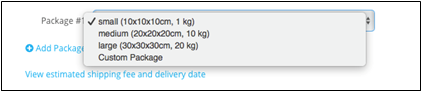
Package selection: Add more packages to the shipment by ‘Add package’ icon.
Package selection: Add more packages to the shipment by ‘Add package’ icon.
Adding new package to a shipment
Adding new package to a shipment

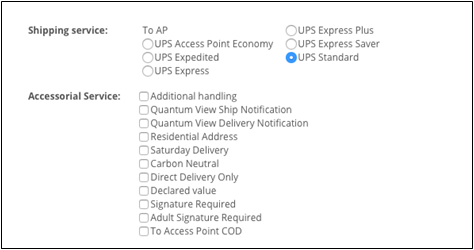
Edit Shipping services and Accessorial services before creating a shipment: User can change the ship
Edit Shipping services and Accessorial services before creating a shipment: User can change the shipping service and accessorial services of the shipment by selecting in the service list. Note: When user select ‘Declared value’ accessorial service to apply to a shipment, that value is automatically load from the associated order value from Prestashop database.
Bulk action for orders
Bulk action for orders
User can check the estimated shipping fee and estimated delivery date of the current shipment by cli
User can check the estimated shipping fee and estimated delivery date of the current shipment by clicking on the link ‘View estimated shipping fee and delivery rate’ at the bottom of the window.
User confirm creating shipment by clicking to button ‘Create Shipment’.
User confirm creating shipment by clicking to button ‘Create Shipment’.
3. Zendingen
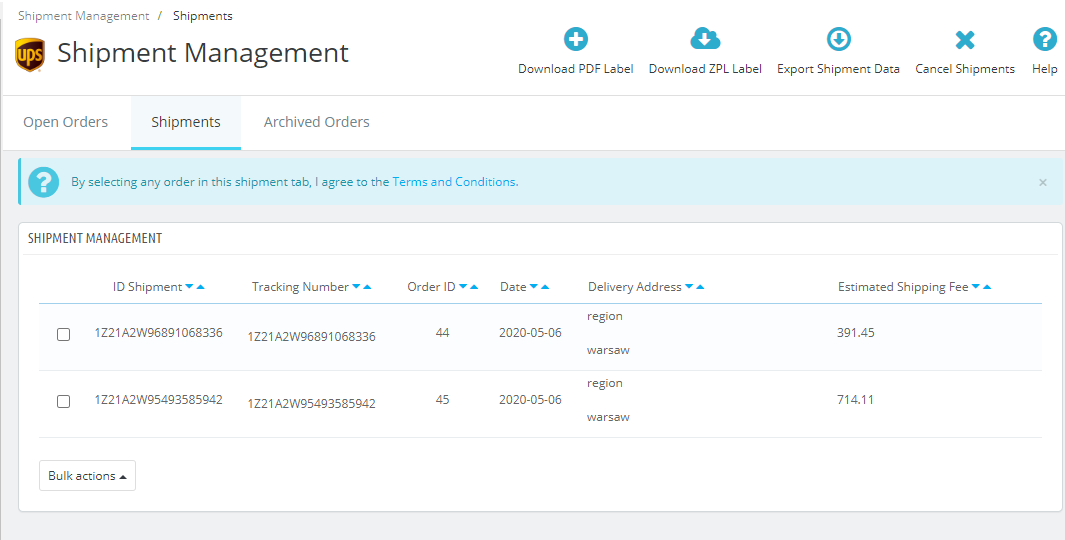
User can view the list of shipments created in the ‘Shipments’ tab.
User can view the list of shipments created in the ‘Shipments’ tab.
User can view the list of shipments created in the ‘Shipments’ tab.
From this tab user can select one or multiple shipments and process the following actions: Download
From this tab user can select one or multiple shipments and process the following actions: Download PDF Label: user can download a zip PDF file of shipping labels of the selected shipments by clicking on ‘Download PDF Label’ button.
Download ZPL Label: user can download a zip ZPL file of shipping labels of the selected shipments by
Download ZPL Label: user can download a zip ZPL file of shipping labels of the selected shipments by clicking on ‘Download ZPL Label’ button. Customer can use these files to print on the labels on ZPL supported printer. As an example, refer below link on how you can print ZPL labels - https://supportcommunity.zebra.com/s/article/ZebraDesigner-Driver-and-the-Send-File-Feature?language=en_US
Export Shipments: user can export the data of all the selected shipments to an Excel file by clickin
Export Shipments: user can export the data of all the selected shipments to an Excel file by clicking on ‘Export Shipment Data’ button.
Cancel Shipments: user can cancel the selected shipments by clicking on ‘Cancel Shipments’ button. T
Cancel Shipments: user can cancel the selected shipments by clicking on ‘Cancel Shipments’ button. The shipment can only be cancelled if it is not yet processed by UPS. If the shipment is already in transit or delivered, it cannot be cancelled from this screen.
If the shipment is successfully voided, the status of the associated orders will be changed to ready
If the shipment is successfully voided, the status of the associated orders will be changed to ready to processed, and the orders will appear in the Open Order tab.
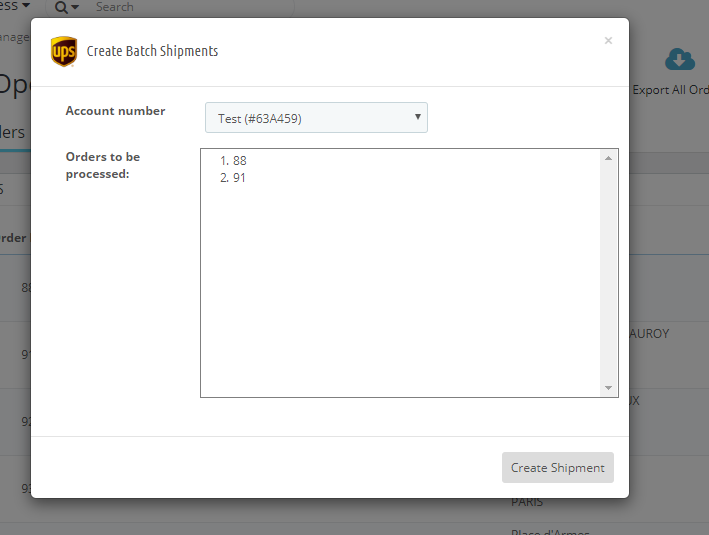
4. Batch Zendingen Maken
User can create batch shipments from a list of orders with both To AP and To Address.

User can create batch shipments from a list of orders with both To AP and To Address.
User can create batch shipments from a list of orders with both To AP and To Address.
Account number selection: Select the Account number to associate with the shipment by the dropdown ‘
Account number selection: Select the Account number to associate with the shipment by the dropdown ‘Account Number’.
User confirms creating shipment by clicking to button ‘Create Shipment’.
User confirms creating shipment by clicking to button ‘Create Shipment’.
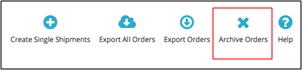
5. Bestellingen Archiveren
User can put the orders into Archived Orders tab by selecting the orders from Open Orders tab and select action Archive Order.

User can put the orders into Archived Orders tab by selecting the orders from Open Orders tab and se
User can put the orders into Archived Orders tab by selecting the orders from Open Orders tab and select action Archive Order.
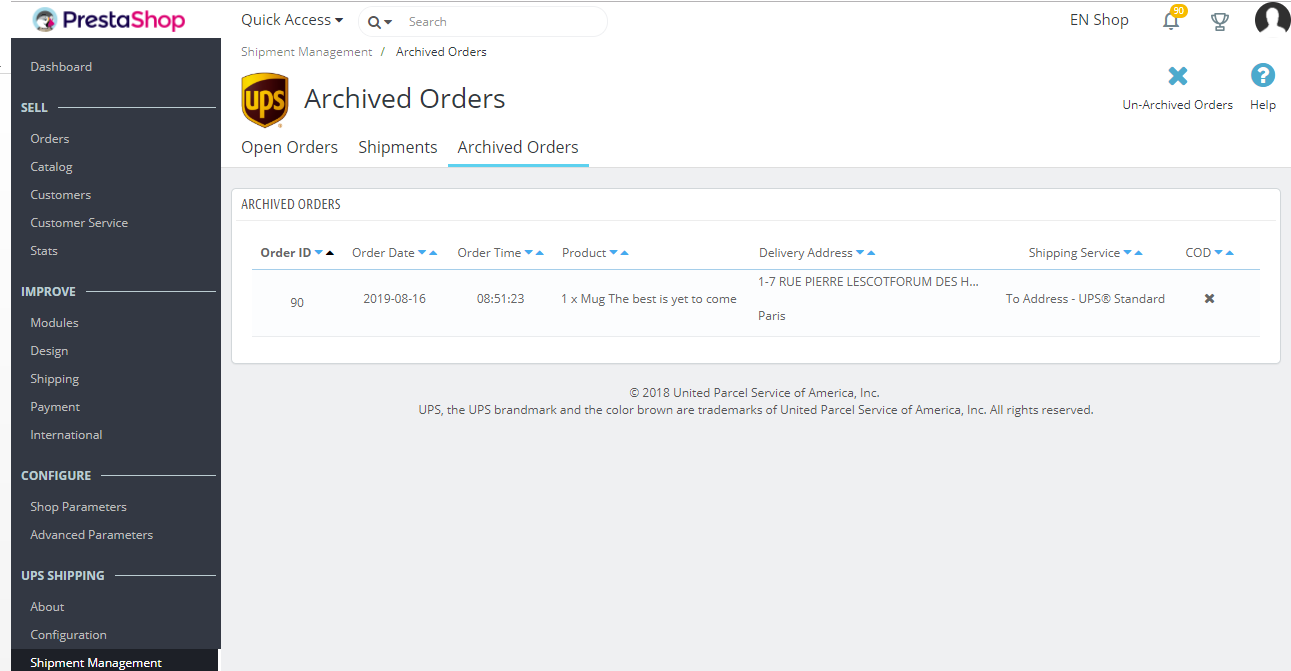
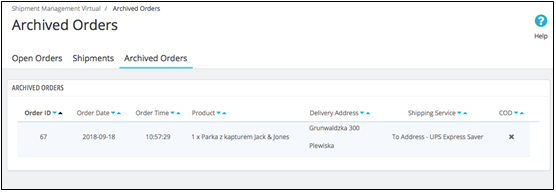
User can view the archived orders by clicking to the tab Archived Orders.
User can view the archived orders by clicking to the tab Archived Orders.

Once an order is put into Archived Orders tab, it cannot be put back.
Once an order is put into Archived Orders tab, it cannot be put back.
6. Bestellingen On-Archiveren
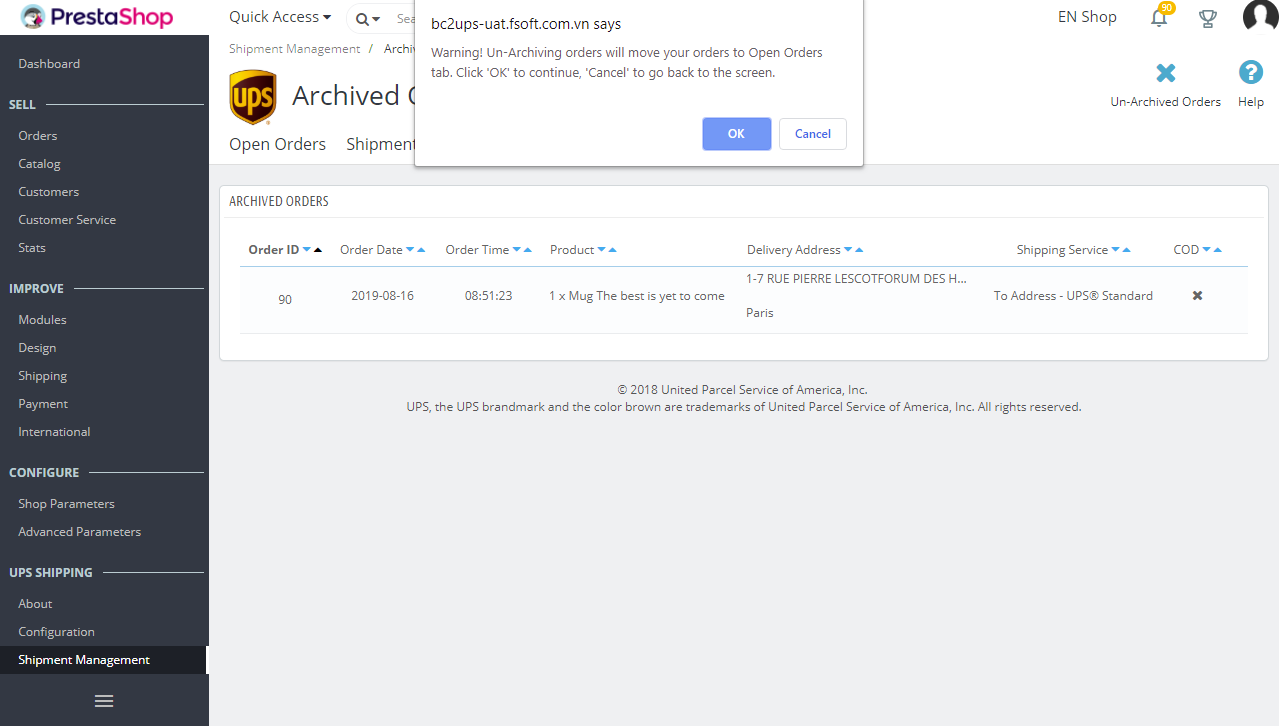
User can put the orders into Open Orders tab by selecting the archived orders from Archived Orders tab and selecting action Un-Archive Orders.

User can put the orders into Open Orders tab by selecting the archived orders from Archived Orders t
User can put the orders into Open Orders tab by selecting the archived orders from Archived Orders tab and selecting action Un-Archive Orders.

The message confirm will appear to confirm un-archived orders.
The message confirm will appear to confirm un-archived orders.
User can view the un-archived orders by clicking on the tab Open Orders
User can view the un-archived orders by clicking on the tab Open Orders
7. Gegevensbewaring
Order and shipment data are stored in the database for a defined period of time as described below: Data in ‘Open Orders’ tab for over 90 days will be moved to ‘Archived Orders’ tab.
Order and shipment data are stored in the database for a defined period of time as described below:
Order and shipment data are stored in the database for a defined period of time as described below: Data in ‘Open Orders’ tab for over 90 days will be moved to ‘Archived Orders’ tab.
Data in ‘Archived Orders’ tab for over 90 days will be deleted.
Data in ‘Archived Orders’ tab for over 90 days will be deleted.
Data in ‘Shipment’ tab for over 90 days will be deleted.
Data in ‘Shipment’ tab for over 90 days will be deleted.