







2. Tarifas en Vivo de UPS para WooCommerce
Configura las Tarifas en Vivo de UPS para mostrar los costos de envío en tiempo real en el proceso de pago de WooCommerce. Cubre la configuración de tarifas, servicios y pruebas.
Guía paso a paso
Inicie sesión en el Panel de Control de UPS y en el Backend de WooCommerce
Ensure you are logged into ups.dashboardlink.com. Open a second tab and log into your WooCommerce backend.
→ https://ups.dashboardlink.com/Install the UPS Live Rates plugin in WooCommerce.
Install the UPS Live Rates plugin in WooCommerce.
→ https://link.ecommerce.help/ups-plugins-woocommerce/live-rates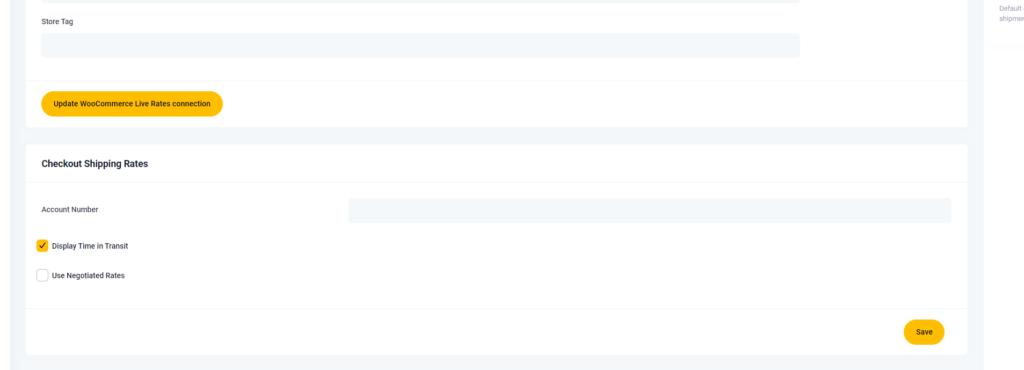
Go to WooCommerce settings.
Go to WooCommerce settings.
Navigate to shipping and select shipping zones.
Navigate to shipping and select shipping zones.
Choose UPS services to display in the checkout for the specific zone.
Choose UPS services to display in the checkout for the specific zone.

Example: Add UPS standard service for the zone of Germany.
Example: Add UPS standard service for the zone of Germany.
Once selected, the UPS services should be activated.
Once selected, the UPS services should be activated.
Proceed to checkout and add a proper address to see UPS standard rates.
Proceed to checkout and add a proper address to see UPS standard rates.
To display additional services, go back to the shipping zone settings.
To display additional services, go back to the shipping zone settings.
Select another service (e.g., UPS Express) and refresh the page to view both rates.
Select another service (e.g., UPS Express) and refresh the page to view both rates.
In the eCommerce shipping dashboard, configure topics for live rates.
In the eCommerce shipping dashboard, configure topics for live rates.

Include time and transit information and use negotiated rates.
Include time and transit information and use negotiated rates.
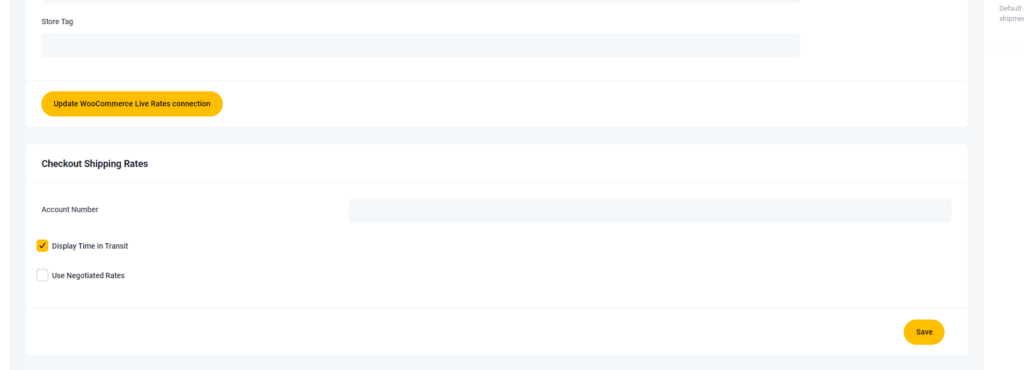
To display negotiated rates, add the UPS account number in the specified section.
To display negotiated rates, add the UPS account number in the specified section.
Subir e Instalar el Plugin de Tarifas en Vivo de UPS
In the WooCommerce backend, navigate to the plugins section where you can upload a new plugin. Choose the downloaded UPS plugin file. Click on the "Install Now" button. Activate the plugin once it is installed.
→ https://link.ecommerce.help/ups-plugins-woocommerce/live-ratesConectar Tarifas en Vivo de UPS
After activation, find the plugin in your plugin overview. Click on the plugin and locate the UPS live rates option. Click on the UPS live rates button to initiate the connection. Log in to UPS, accept terms and conditions, and click continue.
Configurar Tarifas en Vivo
You will be redirected to your UPS shipping dashboard. Start the configuration of your live rates within the UPS shipping dashboard. Go to WooCommerce settings. Navigate to shipping and select shipping zones. Choose UPS services to display in the checkout for the specific zone. Example: Add UPS standard service for the zone of Germany.

Activar Servicios y Probar
Once selected, the UPS services should be activated. Proceed to checkout and add a proper address to see UPS standard rates. To display additional services, go back to the shipping zone settings. Select another service (e.g., UPS Express) and refresh the page to view both rates. In the eCommerce shipping dashboard, configure topics for live rates. Include time and transit information and use negotiated rates.
Tarifas Negociadas
To display negotiated rates, add the UPS account number in the specified section.