2. Installation von UPS Versand und UPS Access Point™: Offizielle Erweiterung
Schritt-für-Schritt Installationsanleitung. Installation von UPS Versand und UPS Access Point™: Offizielle Erweiterung. Behandelt Download, Einrichtung und erste Konfiguration.
Schritt-für-Schritt-Anleitung
1. Laden Sie die UPS Erweiterungs-ZIP-Datei hoch
Go to OpenCart site -> Extensions -> Installer
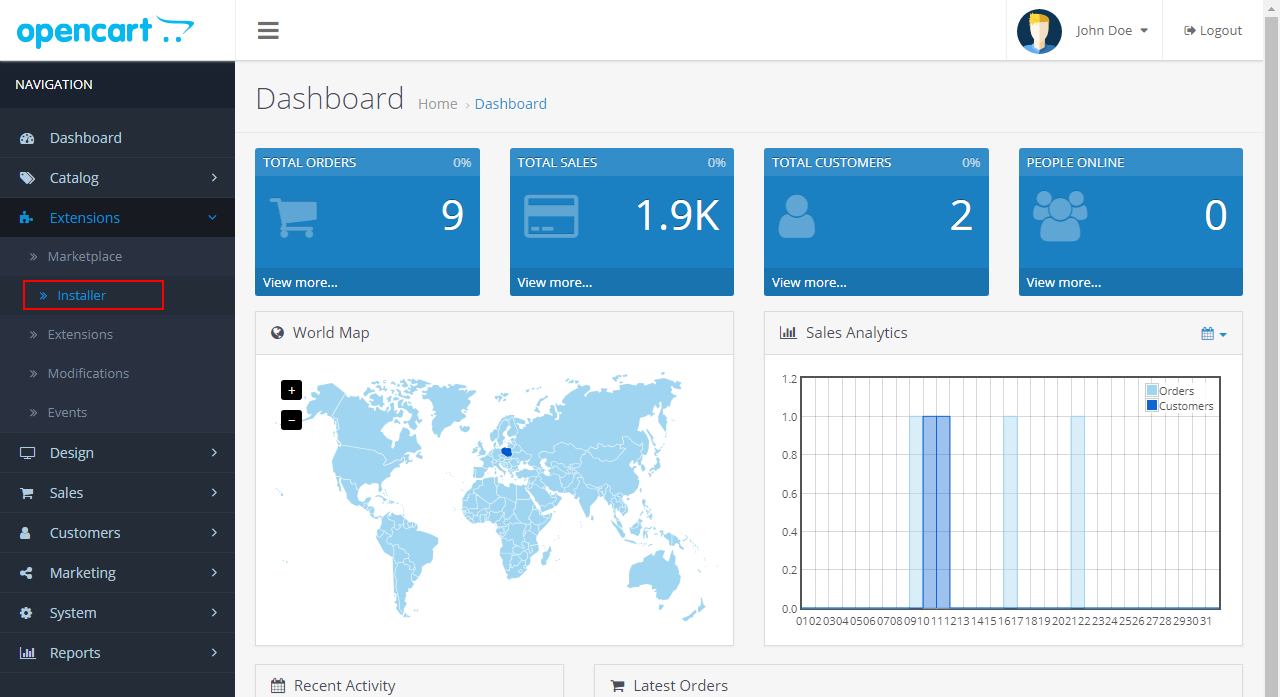
Go to OpenCart site -> Extensions -> Installer
Go to OpenCart site -> Extensions -> Installer

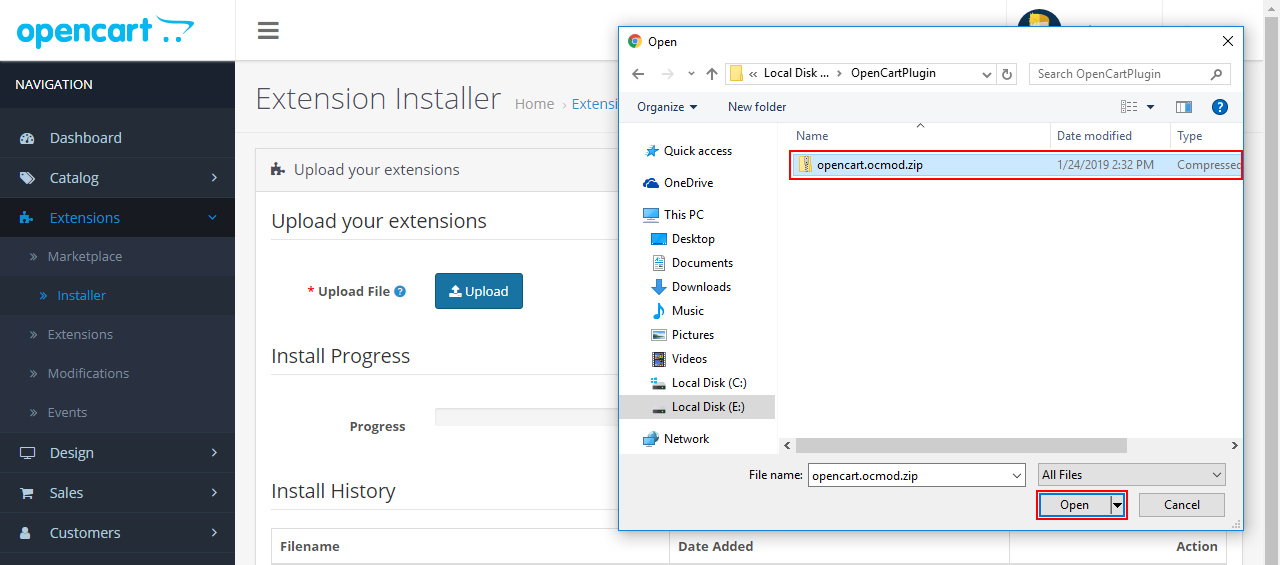
Click on the “Upload” button
Click on the “Upload” button

Select opencart.ocmod.zip file
Select opencart.ocmod.zip file

OpenCart system will automatically install the module.
OpenCart system will automatically install the module.

2. Aktivieren Sie das UPS Versandmodul im Backend.
Go to: Extensions -> Extensions -> Choose the extension type -> Modules

Go to: Extensions -> Extensions -> Choose the extension type -> Modules
Go to: Extensions -> Extensions -> Choose the extension type -> Modules

Click on the install icon (+) to enable “UPS Shipping and UPS Access Point™ : Official Extension”
Click on the install icon (+) to enable “UPS Shipping and UPS Access Point™ : Official Extension”

“UPS Shipping and UPS Access Point™ : Official Extension” is enabled in Back office
“UPS Shipping and UPS Access Point™ : Official Extension” is enabled in Back office

3. Aktivieren Sie „UPS Versand und UPS Access Point™: Offizielle Erweiterung“ im Frontend
Go to: Extensions -> Extensions -> Choose the extension type -> Shipping

Go to: Extensions -> Extensions -> Choose the extension type -> Shipping
Go to: Extensions -> Extensions -> Choose the extension type -> Shipping

Click on the install icon (+) to install “UPS Shipping and UPS Access Point™ : Official Extension” f
Click on the install icon (+) to install “UPS Shipping and UPS Access Point™ : Official Extension” for Front office:

Click on the icon Edit to enable “UPS Shipping and UPS Access Point™ : Official Extension” for Front
Click on the icon Edit to enable “UPS Shipping and UPS Access Point™ : Official Extension” for Front office:

Choose the option “Enabled” and click “Save”:
Choose the option “Enabled” and click “Save”:

4. Cache leeren nach der Installation von UPS Versand und UPS Access Point™: Offizielle Erweiterung
Click to menu Extensions -> Extensions -> Modifications to go Modifications screen

Click to menu Extensions -> Extensions -> Modifications to go Modifications screen
Click to menu Extensions -> Extensions -> Modifications to go Modifications screen

Click to the “Clear” button to clear cache.
Click to the “Clear” button to clear cache.

Click to the “Refresh” button to rebuild your modification cache
Click to the “Refresh” button to rebuild your modification cache