1. Etsy Onboarding Guide
Etsy Onboarding Guide Complete onboarding walkthrough from account setup to first shipment.
Step-by-Step Guide
Etsy UPS Shipping Onboarding Overview
This guide covers the steps to set up and manage UPS shipping for your Etsy store. It's designed for Etsy sellers looking to streamline their shipping process using UPS.
Register or Log into UPS Dashboard
Create a new account or log into your existing UPS Dashboard account to begin the setup process.
Visit the registration page at https://ups.dashboardlink.com/register to create a new account. If you already have an account, log in at https://ups.dashboardlink.com/login.
→ https://ups.dashboardlink.com/register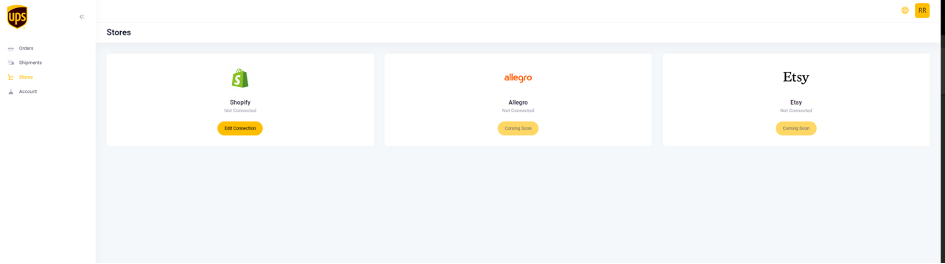
Connect Your Etsy Store
Link your Etsy store to the UPS Dashboard using Etsy's Custom App approach.
After logging into your dashboard, navigate to https://ups.dashboardlink.com/de/stores. Click on the 'Edit Connection' button for Etsy to establish the connection.
→ https://ups.dashboardlink.com/de/stores
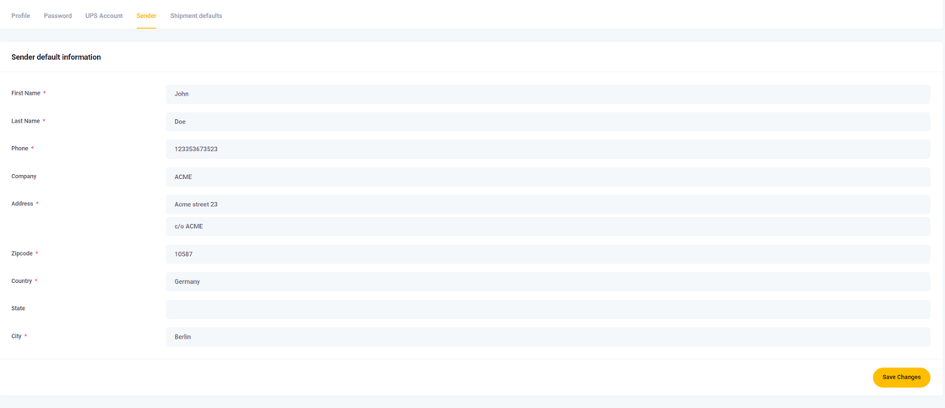
Set Default Shipping Values
Configure default shipper information and package measurements for your orders.
Go to https://ups.dashboardlink.com/user/profile# and open the 'Sender' tab to enter your Sender details. Then, set default package measurements under the 'Shipment defaults' tab to ensure consistency across orders.
→ https://ups.dashboardlink.com/user/profile#
Enter Sender Information
Input your sender details to be prefilled for every order.
Ensure all necessary fields are filled out to avoid manual entry for each order.
Set Package Measurement Defaults
Define default package dimensions for orders without specified measurements.
These defaults will be used unless overridden by specific order details. Adjust as needed before printing labels.

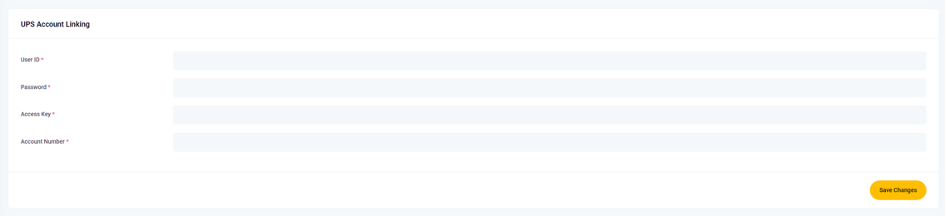
Link Your UPS Account
Integrate your UPS account with the dashboard to enable shipping.
Access the 'UPS Account' tab and input the required information to link your UPS account. This step is crucial for processing shipments.

Create Etsy UPS Shipping Rates
Define shipping rates in Etsy that align with UPS services to filter orders accordingly.
Name your shipping rates starting with 'UPS' to ensure they are recognized by the dashboard. For detailed setup, refer to the Etsy Help Center.
Manage Orders and Shipments
View and process open orders from the dashboard to create shipments.
Navigate to https://ups.dashboardlink.com/orders to see open orders. Use the 'Action' button to view details or create shipping labels.
→ https://ups.dashboardlink.com/orders
View Order Details
Access detailed information about each order.
The order details page provides an overview and options to create labels or update tracking information.

Create Shipping Label
Generate a shipping label for an order.
Select 'Create Shipment' to add missing information and finalize the package details. Confirm sender and receiver information before proceeding.

Configure Shipment Details
Adjust shipment settings and finalize the shipping label.
Ensure all mandatory fields are completed, configure UPS service and packaging options, and click 'Create Shipping' to generate the label. The order will move to the 'Shipments' section.

Access Support
Reach out for assistance if you encounter issues.
Open a support case at https://ecommerce.help/service/shipping/ups-plugins/#ticket or email upsplugins@ecommerce.help for help with the dashboard.
→ https://ecommerce.help/service/shipping/ups-plugins/#ticket
Reset Your Password
Follow steps to reset your password if you encounter login issues.
Select ‘Forgot password?’ on the login page, enter your email, and click ‘Email Password Reset Link’. If issues persist, contact support at upsplugins@ecommerce.help.