2. Plugin – Installation & Deployment
1. Install the WooCommerce plugin.
First, check whether WooCommerce plugin is already installed on the system. If the plugin has not been installed, then install WooCommerce plugin. The “UPS Shipping” plugin is compatible with WooCommerce version 3.2 and above.
- In the case that the plugin already exists in the system.
Check WooCommerce version by logging into the system, go to the plugins page by clicking the button “Plugins” on the left menu as shown in the image below.

Figure 1 – Plugin
- In the case that the WooCommerce plugin is not installed, install WooCommerce. You have two ways for doing this
- Install with zip file
- Go to link https://github.com/WooCommerce/WooCommerce/releases. Select version of WooCommerce, and download the zip file. In this example, I selected version 3.2.
- Login to the system, click on the button “Plugins” on the left menu, click on “add new” -> “Upload Plugin” -> “choose file” and click on “Install”.
- Install with zip file
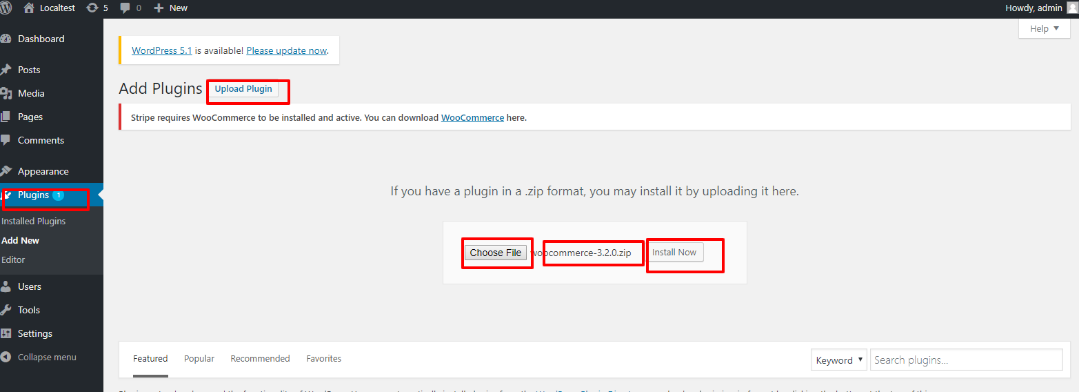
Figure 2 – Plugin install
After installation is successful, the below screen is shown.
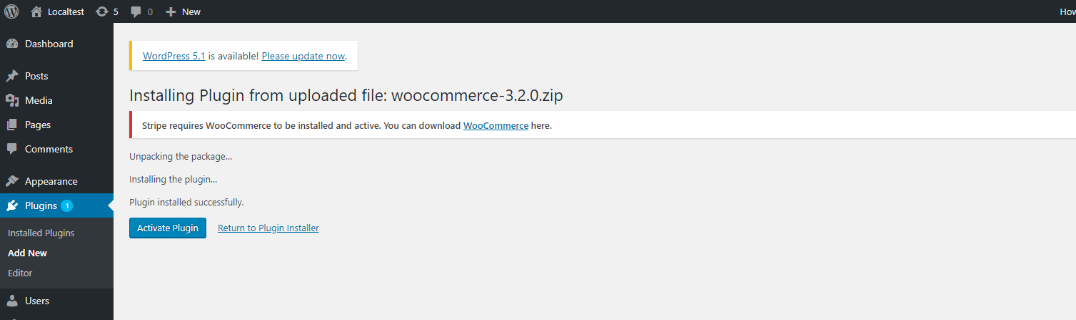
Figure 3 – Plugin install activate
- Install from the plugin page.
- Install directly from the plugin page. Log in to the system, click on button “Plugins” in the left menu, click on button “Add New”, and enter keyword “WooCommerce” in the textbox search on the right of the screen.
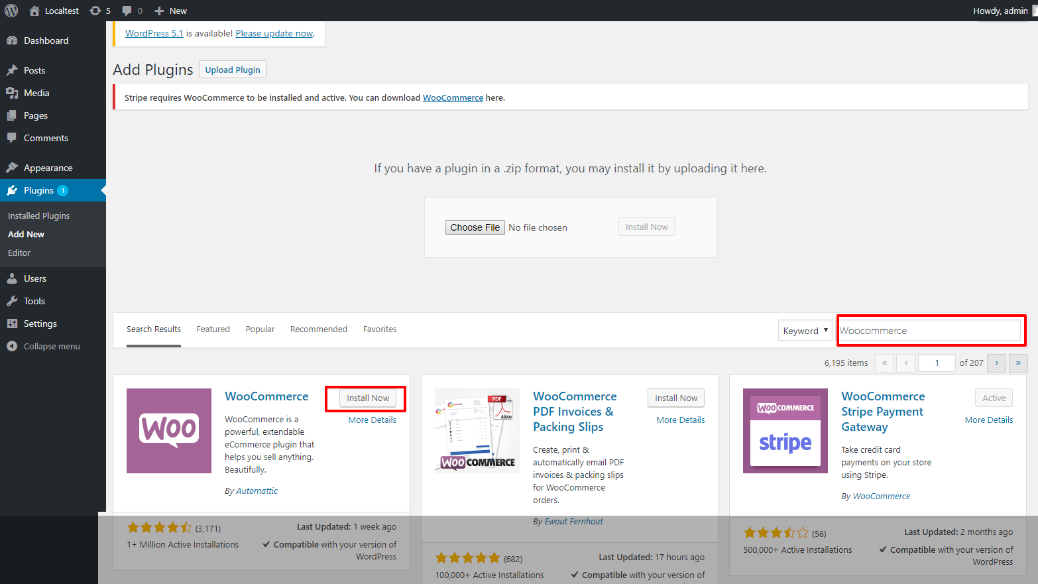
Figure 4 – Plugin search
- Note that with this method, WooCommerce is always of the latest version.
- After installation is successful, go to the plugin page. You will see the WooCommerce plugin, click on the button “activated”.
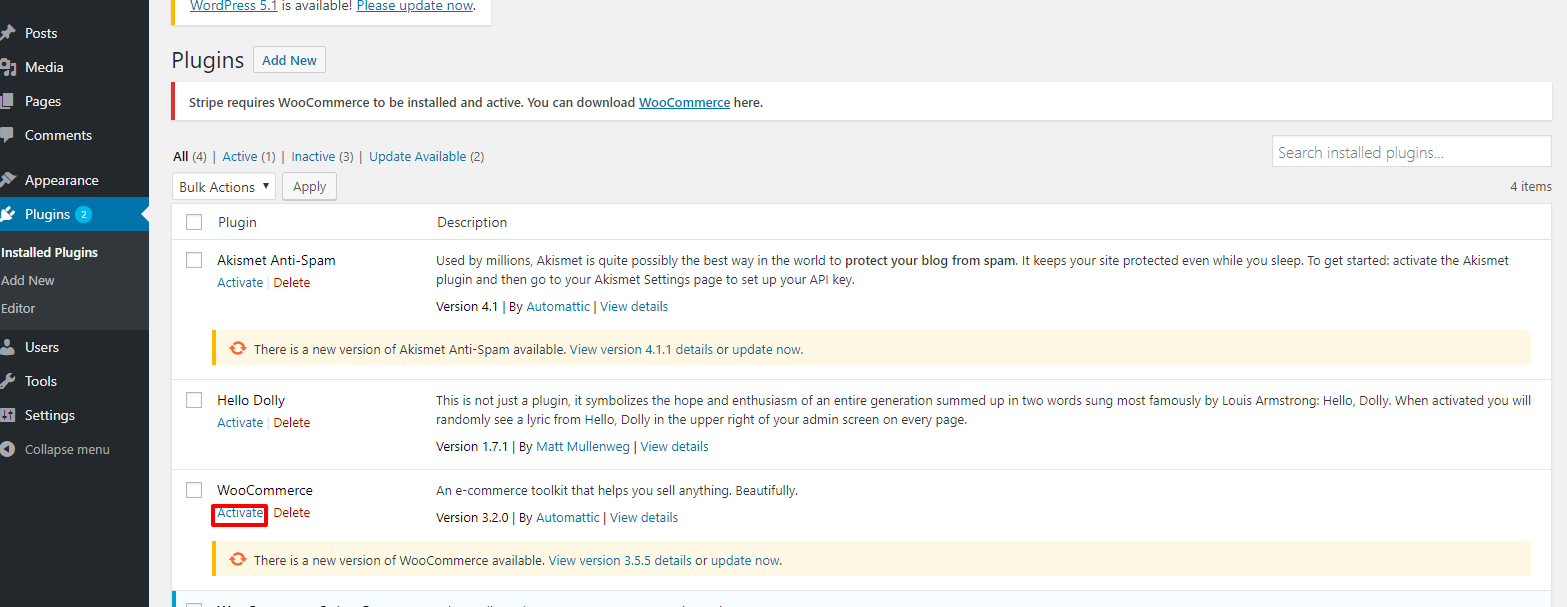
Figure 5 – Plugin activate
Finally, you need to configure the WooCommerce plugin. You can refer at link https://WooCommerce.com for more details.
2. Install the UPS Shipping plugin.
Merchants have two the ways to install the plugin.
a. Install with zip file.
- In the case that the plugin already exist in the system.
- Download the file from https://www.ups.com/pl/en/services/technology-integration/ecommerce-plugins.page at folder “Source_Woocommerce”. Login to the system, go to the plugin page, and click on “Add New” => ”Upload Plugin” => ”Install”.
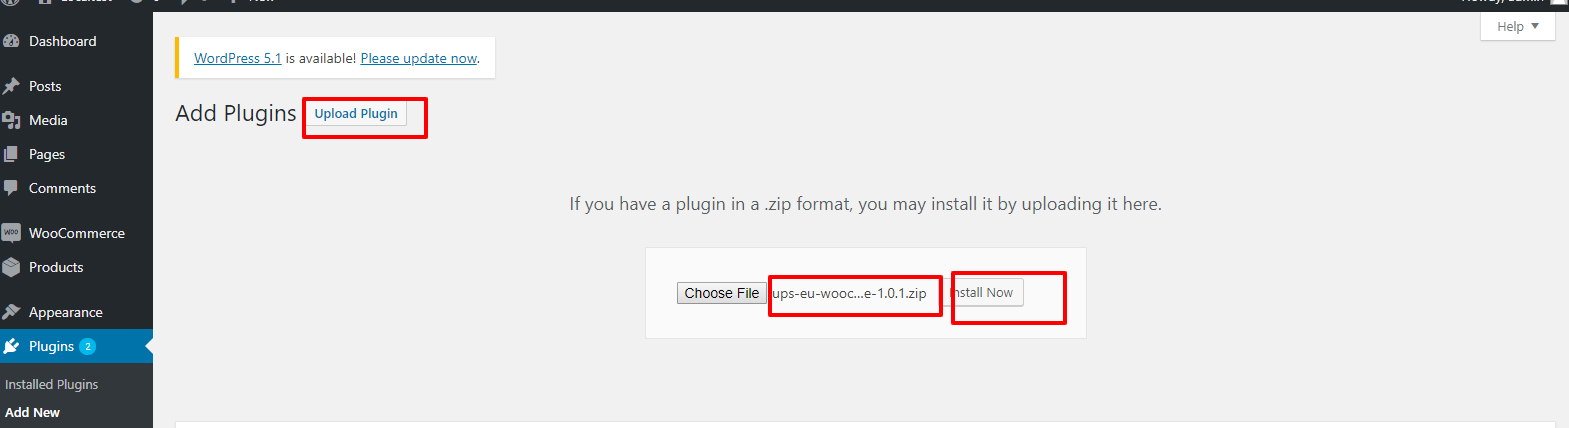
Figure 6 – Plugin upload
- After installation is completed, the following screen will be shown.
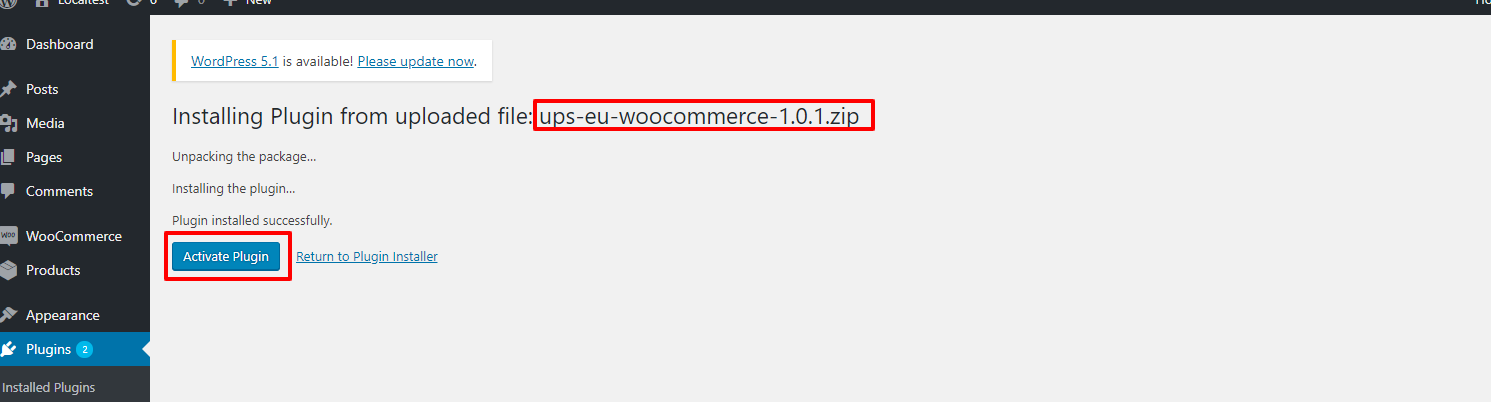
Figure 7 – Plugin install
- Click on “Activate Plugin”. Go to the plugin page by clicking on the button “Plugins” on left menu.
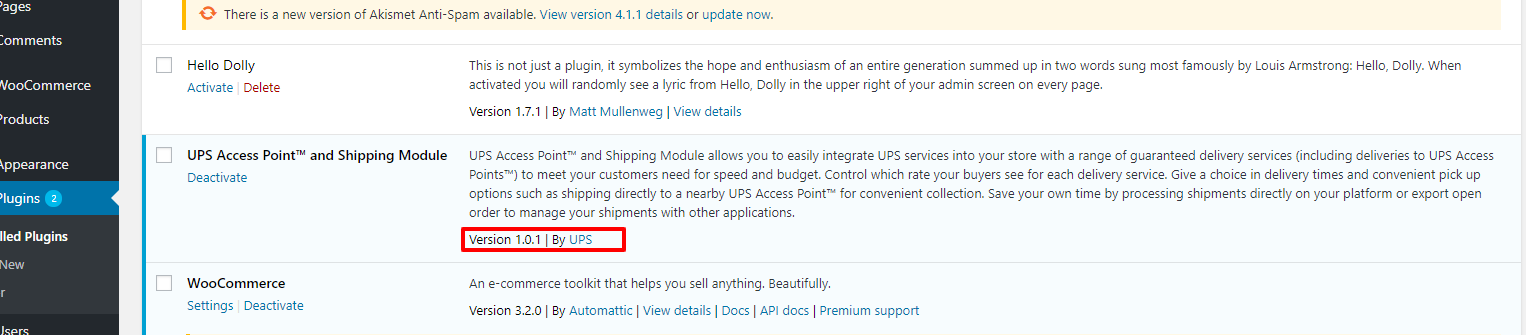
Figure 8 – Plugin version
- In the case there are more than one UPS Shipping plugin in the system.
- Installing an existing version
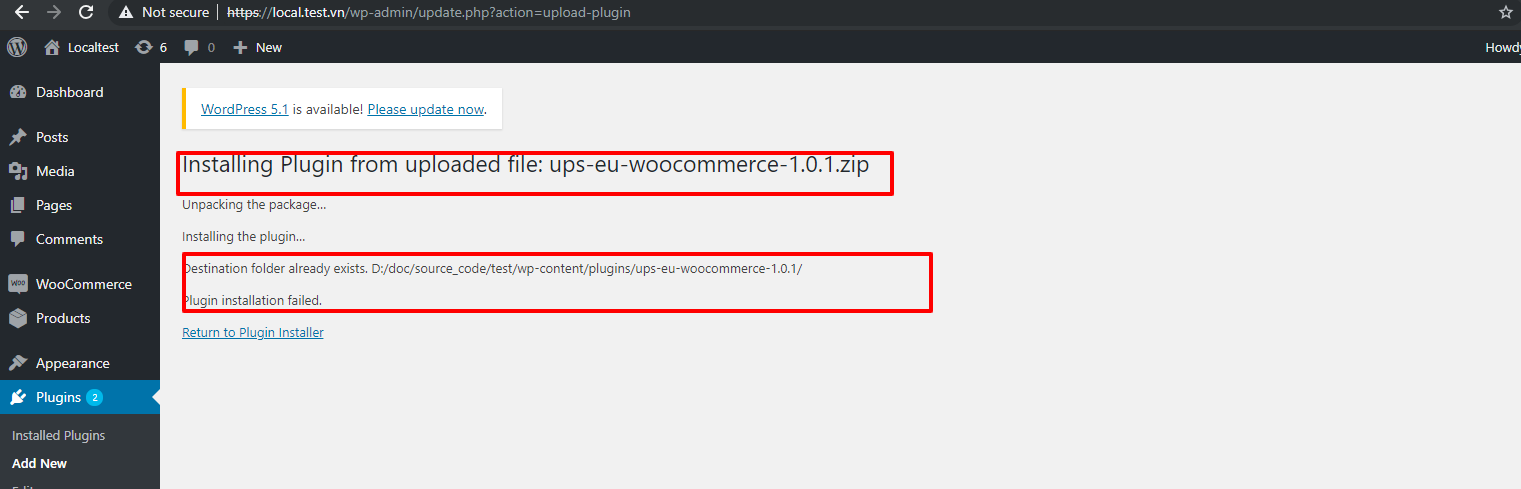
Figure 9 – Plugin install
- Installing a version that does not exist in the system.
- Log in to the system, go to the plugin page, click on button “Add New” => click “Upload Plugin”, select zip file for upload, click “Install”. After installation complete successfully, the below screen is shown.
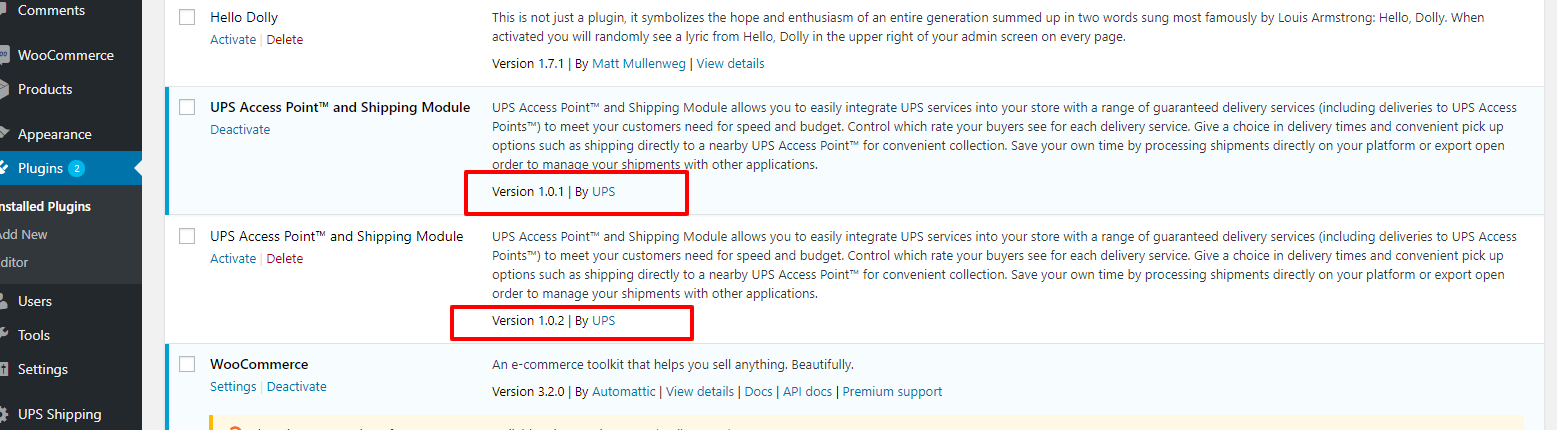
Figure 10 – Plugin version
Note that, at one time, only one version can be activated in the case that multiple versions installed in the system.
How to remove the plugin UPS Shipping on the system (include database and source code). Merchants have two ways to do that.
- Step 1: Delete all UPS Shipping plugins on the system.
- Step 2: Deactivate the current version of UPS Shipping. You can click “deactivated”, then click on “Remove”.
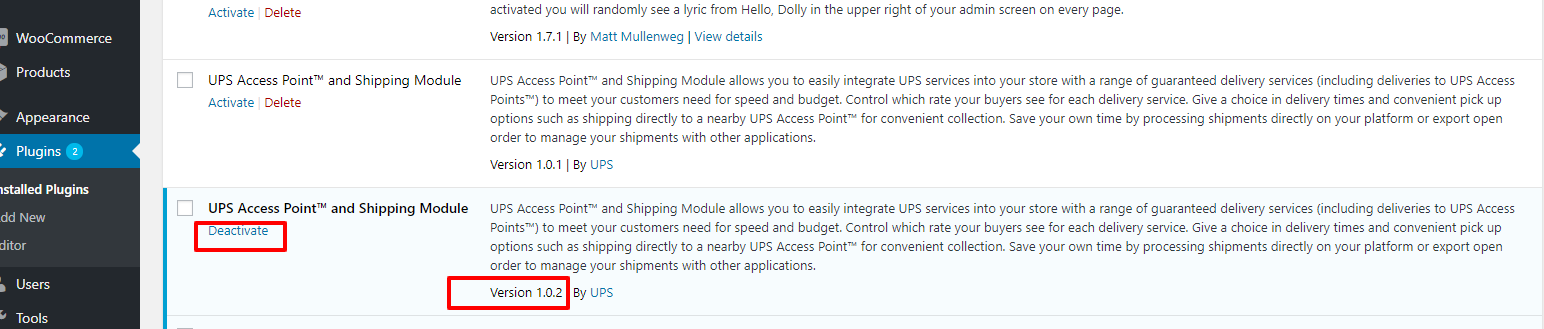

Figure 11 – Plugin deactivate
b. Install directly in the plugins marketplace.
- Install directly from the plugin page. Log in to the system, click on button “Plugins” in the left menu, click on button “Add New”, and enter keyword “UPS Shipping and UPS Access Point™: Official Plugin” in the textbox search with keyword on the right of the screen. By this way, the plugin is always of the latest version.
- After installation is successful, go to the plugin page. You will see the UPS Shipping and UPS Access Point™: Official Plugin, click on the button “activated”.
Figure 12 – Plugin version by
c. Enable the UPS Shipping plugin in Back office.

Figure 13 – Plugin enable
After clicking “activate”, the plugin is activated.
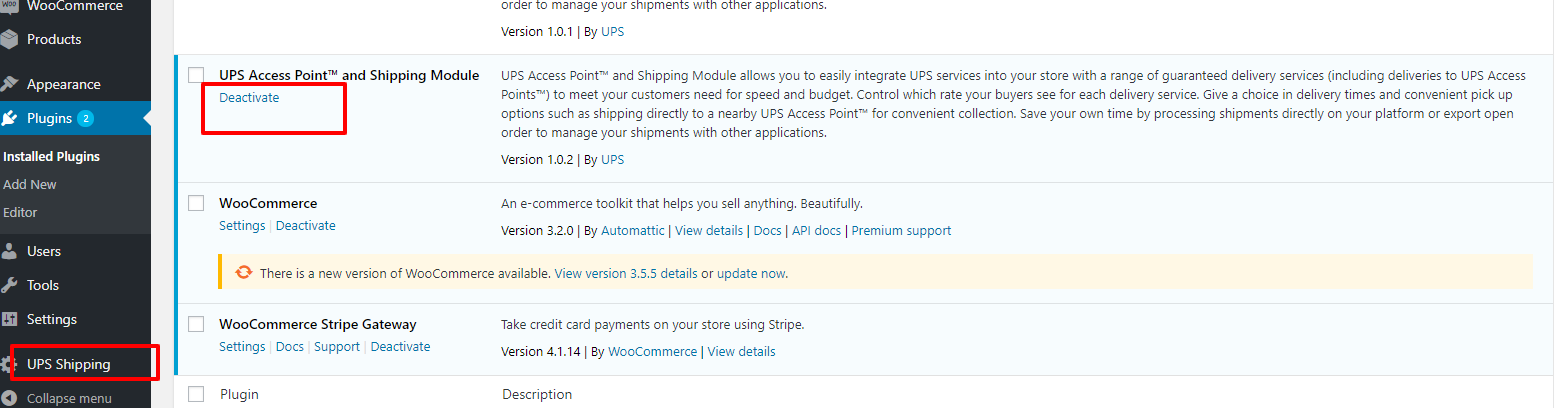
Figure 14 – Plugin activate
d. Enable the UPS Shipping plugin in Font Office.
- Click on “WooCommerce” -> ”Setting” -> ”Shipping” -> “Add shipping zone”.
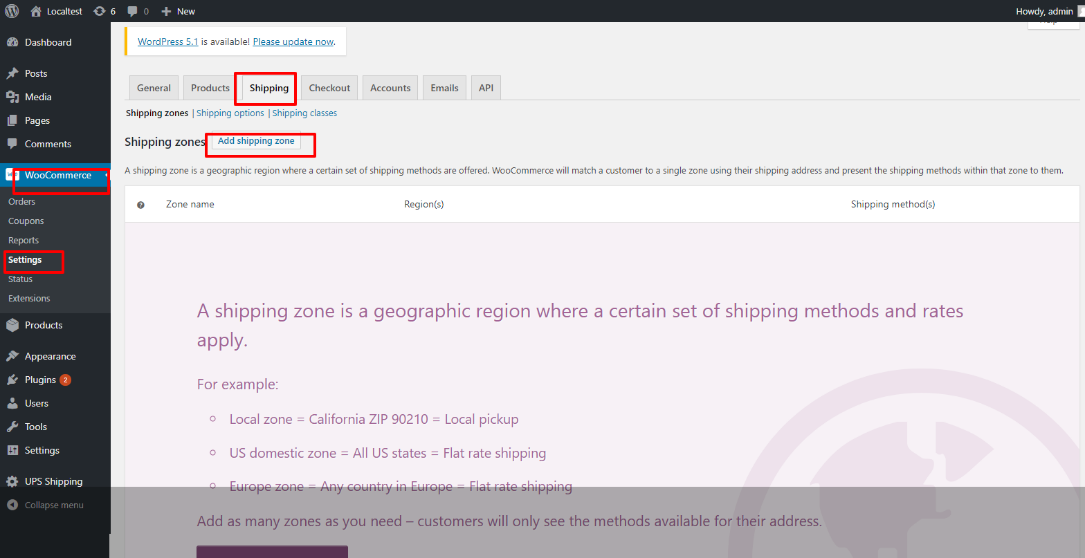
Figure 15 – Plugin shipping enable
- Add shipping method [UPS shipping] to the Shipping zone.
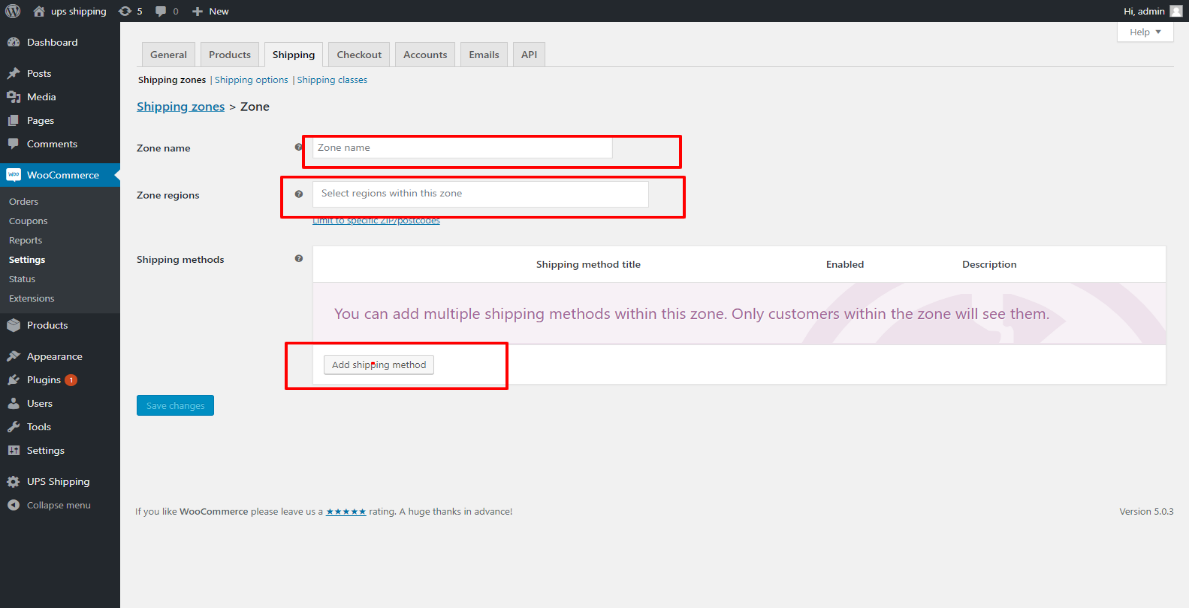
Figure 16 – Plugin shipping zone
- Click on “Add shipping method”, the system will show the popup below. Select “UPS Shipping”. And click on “Save change”.
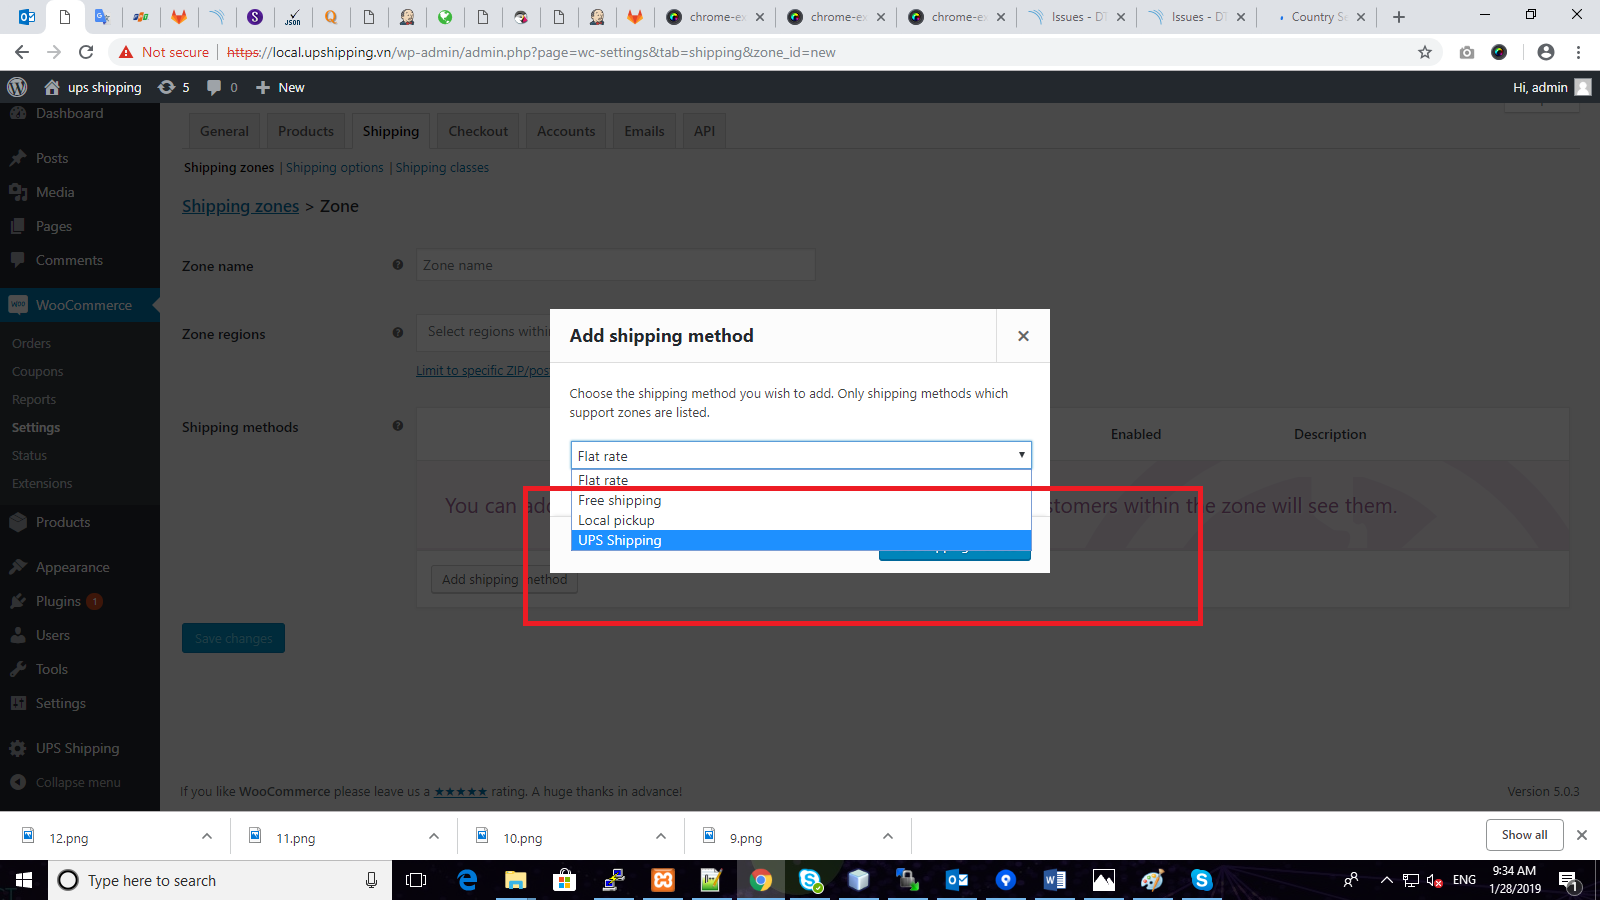
Figure 17 – Add shipping method
e. Upgrade the version of UPS Shipping plugin
- Upgrade new version directly from the plugin page. Log in to the system, click on button “Plugins” in the left menu. If the user see the updated notice, you can choose update new version.
- The user can install the package of new version, de-activate the older version and then activate the new version.
f. Configuration of “Cash on Delivery” and “Shop Currency”
The user can refer to the following links:
=> Cash on Delivery: https://docs.woocommerce.com/document/cash-on-delivery/
For example: In version 3.2 of WooCommerce: Click “WooCommerce” > “Settings” > “Checkout” > “Cash on delivery”.
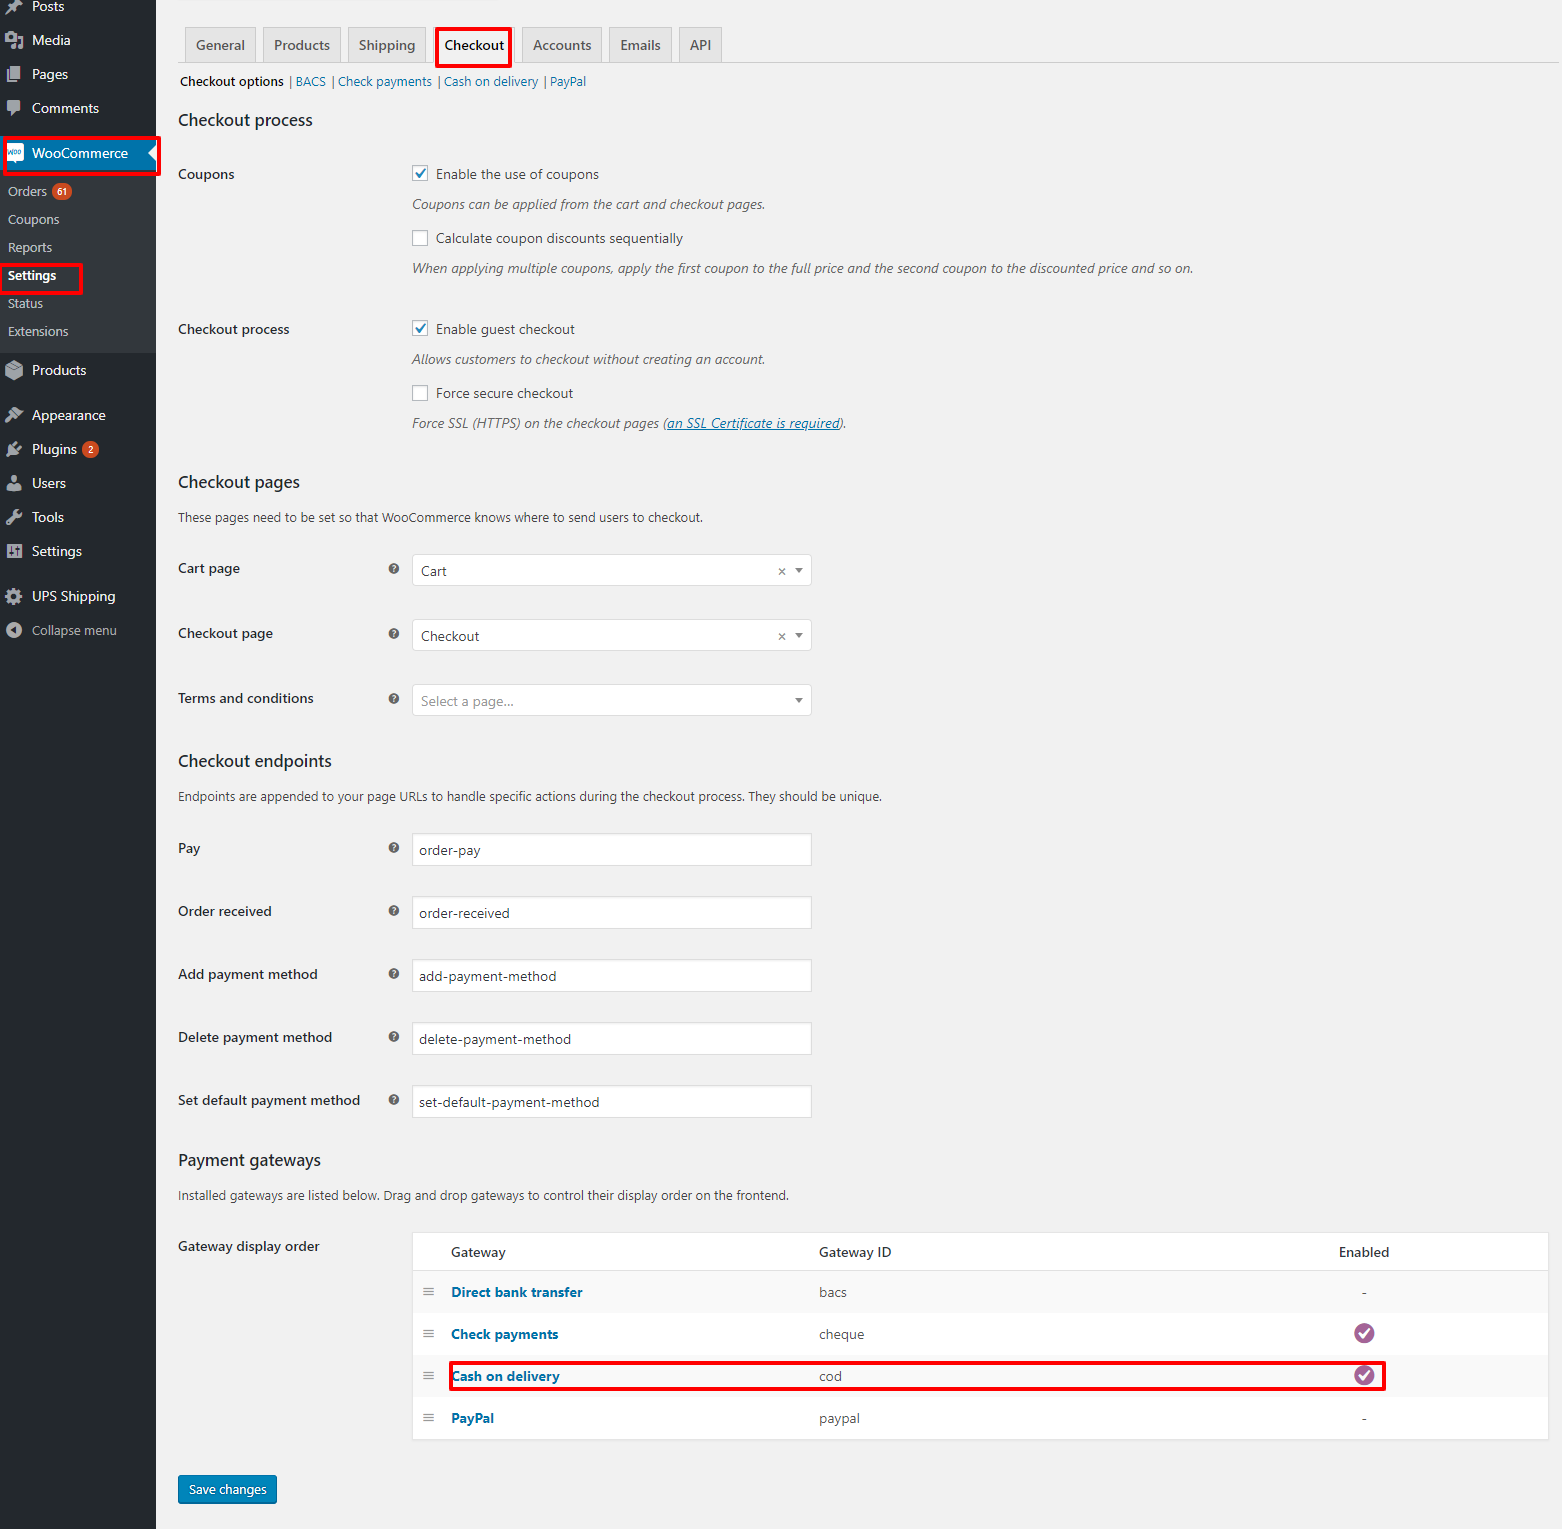
Figure 18 – Checkout
=> Shop Currency: https://docs.woocommerce.com/document/shop-currency/
For example: In version 3.2 of WooCommce: Click “WooCommerce” > “Settings” > “General”, find label “Currency options”
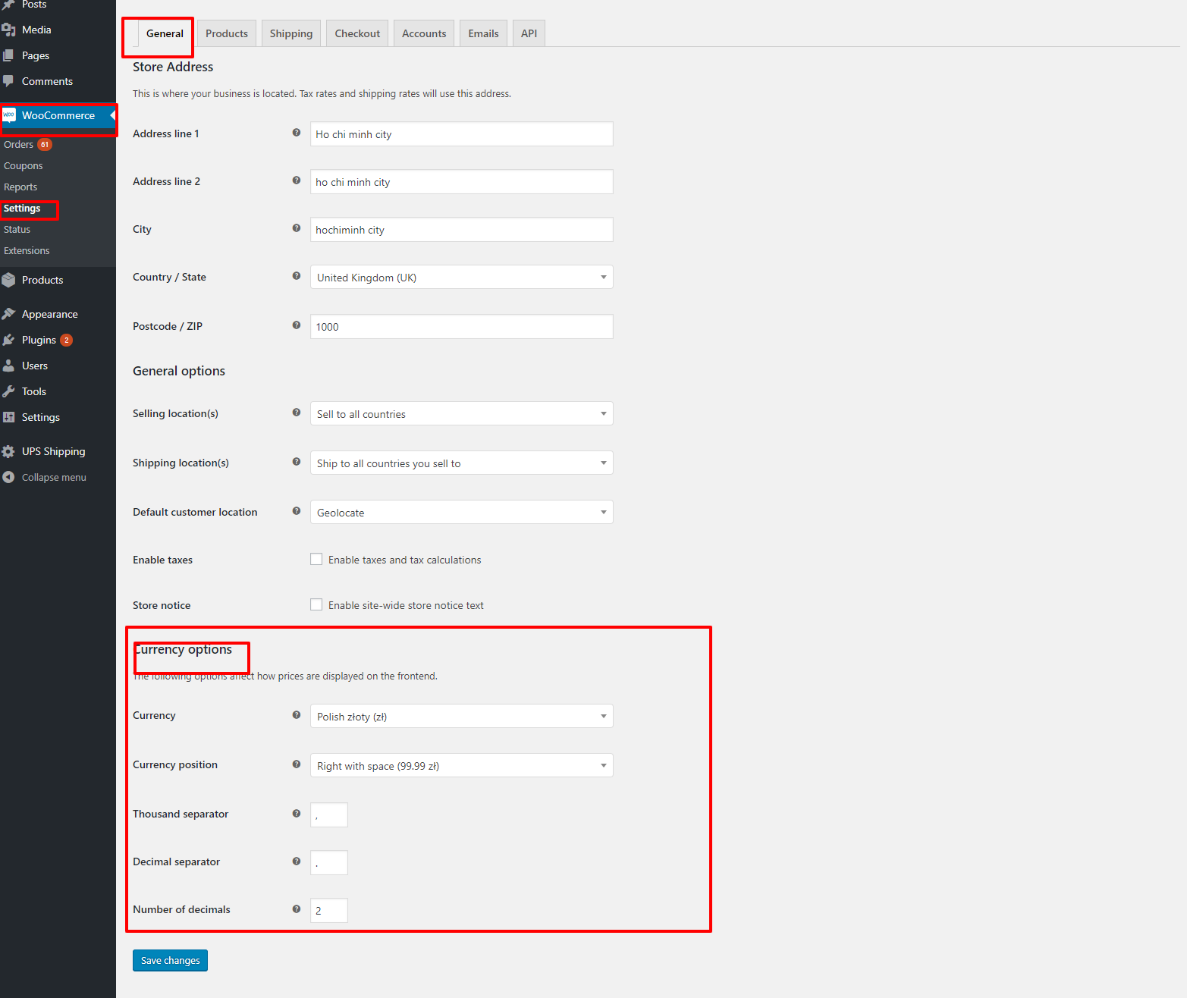
Figure 19 – General
g. Configuration for to show the “calculating shipping” on the cart page
- Configuration in WooCoommerce: Click “WooCommerce” > “Shipping” > “Shipping options” > “Enable the shipping calculator on the cart page”. The detail in the image below:
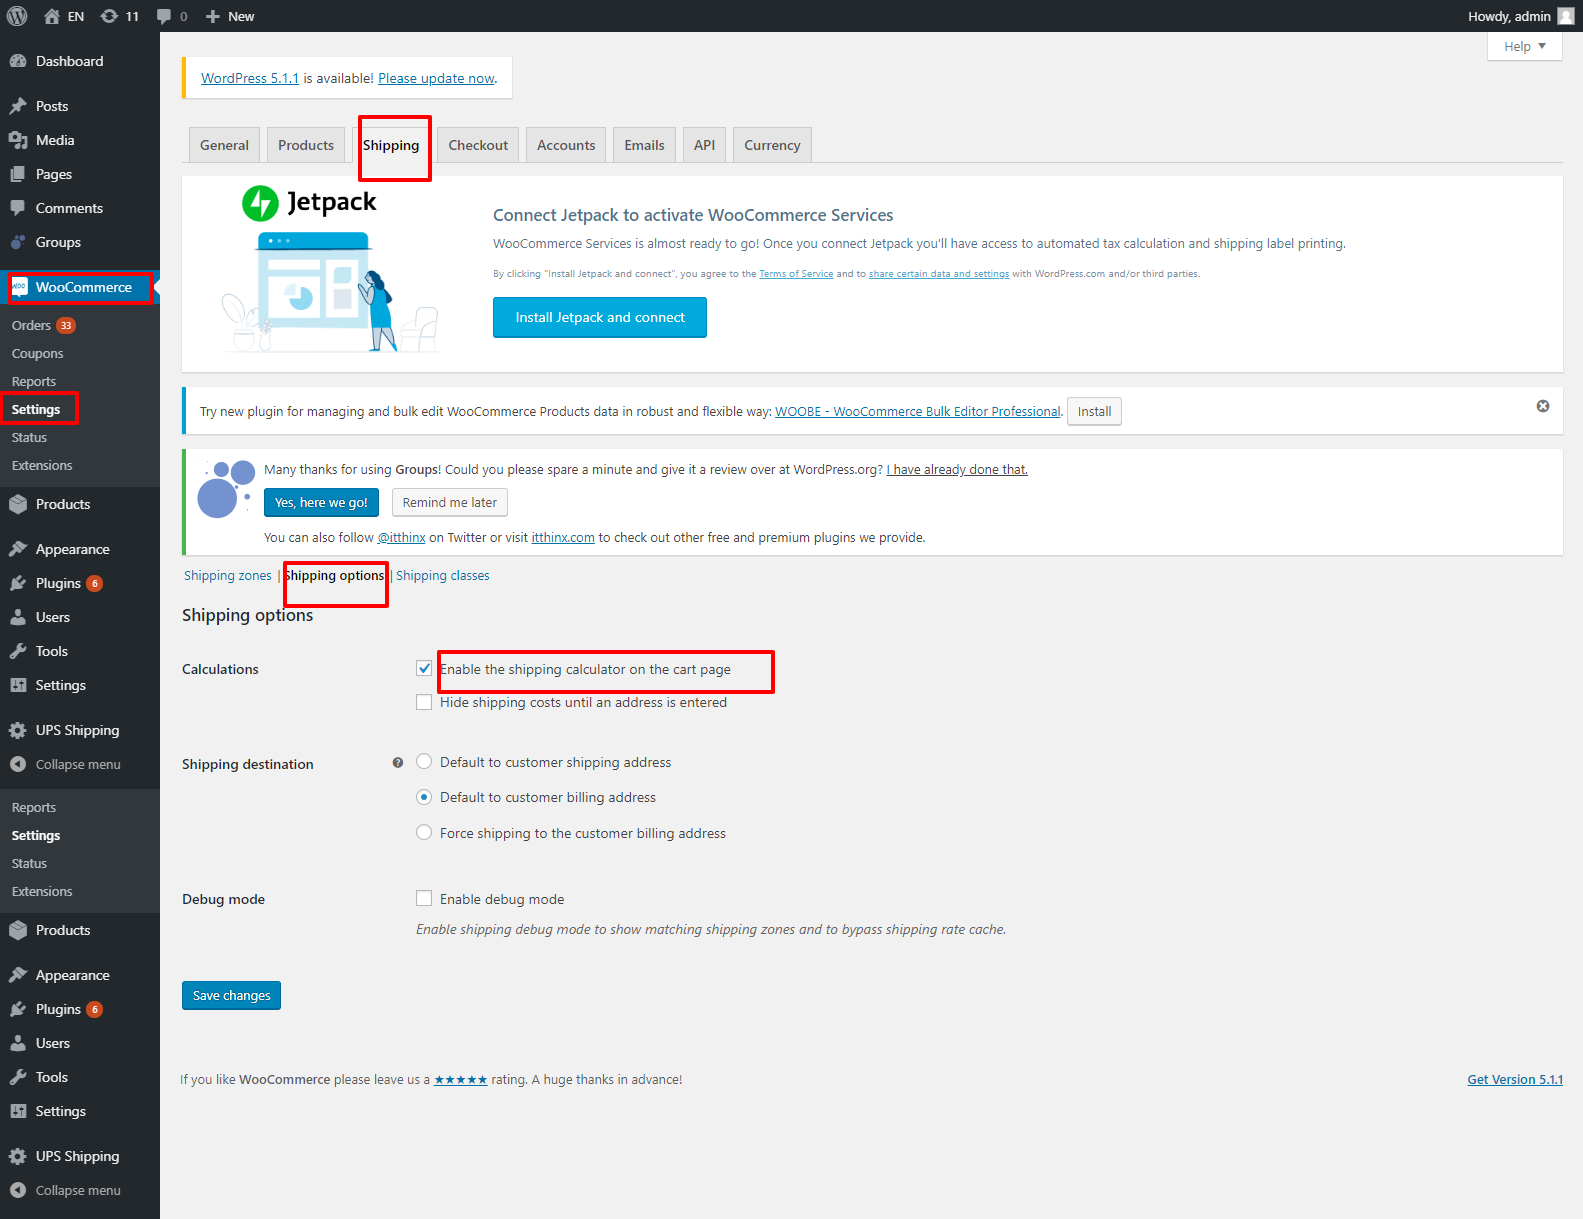
Figure 20 – Shipping options
Was this article helpful?
Have more questions? Submit a request